Organic vs. Hybrid vs. Heirloom…. What’s the difference?

If you have ever gotten confused over all the different names given to different varieties of plants, you are not alone! This is perhaps one of the more complicated aspects of gardening because there are just so many options, so many names, how do you know what to pick?

While picking a favorite variety will take some trial and error in the form of planting and deciding whether you like it or not (or, ask to try your friends produce and ask him or her what variety they planted), being able to choose seeds that are organic, hybrid, open pollinated or heirloom doesn’t have to be that confusing. I will go over each one so you become familiar with the terms.

As a side note, many people are fearful of buying GMO seeds. While GMO seeds are available to farmers, they are not available to the home gardener. If you are purchasing seeds from a home garden seed catalog or purchasing them at a store, you don’t need to worry about accidentally buying GMO (genetically modified) seeds. To buy GMO seed, a farmer often has to sign a contract, so you wouldn’t make any mistake as to what you are buying. So in reality, that “Non-GMO” label doesn’t really mean much, other than to reassure customers.

Hybrid: A hybrid seed will produce a crossbred plant. It is a purposeful cross between two different parent plants. Hybrids can be bred for specific qualities, such as disease resistance, being slow to bolt in hot weather, tolerating drought, maturing early, etc. They also produce pretty constant results. The main downfall to a hybrid seed is that if you plan to save seed for the following year, hybrid seeds will not produce the exact same plant they came from when you plant those seeds the following year. When looking at seed packets, somewhere on the pack you will see either ‘F1’ or the word hybrid in the name or description. It has been said that hybrid plants often lack flavor in exchange for beneficial traits, but that is up to each individual gardener to decide.

Open Pollinated: A seed that is open pollinated means the flowers are either self-fertilized, or fertilized by pollinators or wind. Sometimes by hand, if trying to keep the seed pure for saving. The seed comes from two parents of the same variety so the seed is considered ‘purebred’ and for the purpose of seed saving, if isolation methods are necessary and used, this or heirloom seed is what you want to grow. Often, a seed packet does not specify ‘open pollinated’ on it (it will specify if hybrid), but if you are unsure you can always ask your internet search engine and find out whether the variety you are curious about is open pollinated or hybrid. Sometimes, open pollinated seed is a little more susceptible to pests or disease, or a little more temperamental to deal with. It is interesting to note, that through careful seed saving practices, you can work on correcting these things over time, as the seed learns to adjust and become more tolerant in your own soil. Of course, having fertile soil to begin with, proper spacing, and good management practices go a long way in producing a successful garden no matter the seed!

Organic: Organic seeds can be open pollinated, heirloom, or hybrid seeds. The name means that the plant they came from was grown with organic standards. You can continue to grow them organically once you plant them, or grow them with conventional methods. Organic seeds are always marked organic.

Heirloom: Heirloom seeds are open pollinated, breed true, and passed down from generation to generation. The plants grown from these seeds can be traced back in human history for long periods. These seeds can be organic (if the parent plant was grown with organic standards, and you continue), or conventional. A heirloom variety is often 50-100+ years old. Heirloom seeds are almost always marked as ‘heirloom’ and they are safe to save seed from.

Picking the perfect garden spot

Some of you are hoping to grow your very first garden next year. I am so excited for your adventure! A successful garden starts with a great spot – and finding that spot, and even preparing it now, during the fall, will increase your chances for a fantastic garden. To learn how I prepare my garden beds, feel free to read my post on mulching and my post on whether you need a tiller or not. Both of these have great suggestions for readying your garden.

But your garden location is really, really important. Picking this spot ahead of time can have many benefits. This is especially true if you are growing a garden in a smaller backyard that has a lot of surrounding trees

Pay attention to the potential garden spot through all the seasons, if possible. If you have just moved to a new home, I would suggest planning a garden the following year if possible, so you can watch how your yard behaves through heavy rains (does it drain well? puddle? Run off? Is there erosion?), normal weather, wind flow on windy days, and sun/shade through the seasons.

A large percentage of us decide to grow a garden in the spring. All winter long we think we have the perfect full sun spot picked out and can’t wait to get our seeds in the ground. Then summer comes, and the garden is covered in shade. The leaves grew in on the trees that were bare all winter and spring, and your perfect garden spot is no longer perfect after all. Remember this as you pick your spot!

Pay attention to what grows in your potential new garden spot. Weeds will tell you a lot about the soil. Learn to identify them and what soil preferences they have. Dig in the soil and see what the structure of the soil is like – is it compacted? Very dry? Soggy? Are there earthworms? Is the soil sandy, clay? Are there many rocks? Roots? Rocks and roots will make gardening difficult – not impossible, though difficult. We discovered a rather large concrete pad under a few inches of soil in my preferred garden spot in one of our backyards. We ended up renting a jackhammer to remove it. I know others who have discovered hardware cloth or chicken wire buried below the soil, or trash. A lot can be covered with soil and grass will often grow just fine over it. We want to give our vegetables the opportunity to set roots really deep though to access water and minerals below the surface of the soil. Knowing ahead of time that you may need to spend some time cleaning up your potential gardening spot is helpful so you can get that out of the way before you are prepared to put plants in the ground.

The ideal garden will:

  • Have a minimum of 6-8 hours of direct sunlight, depending on what you want to grow. Most greens, such as lettuce and spinach, can tolerate a mere 4 hours of sunlight, but most gardeners want to grow more than that. Root vegetables, such as potatoes, require 5-6 hours of sunlight, and then fruiting plants, such as tomatoes, will require 8+
  • Be southern facing
  • Away from direct contact with trees, as the roots of a tree will make maintaining a garden difficult and they will compete for water and nutrients with your vegetables (not to mention, shade!).
  • Have a sandy loam, though growing in clay is often successful. You can always make the soil you have better over time by adding organic matter, but if you have the choice, often a sandy loam is preferable. A ‘loam’ has approximately 40% sand and silt, and 20% clay. A ‘sandy loam’ will have more sand percentage at the expense of clay and silt. Of course, a mainly sandy garden or mainly clay garden will have issues of its own, but a good balance is ideal. If you have ‘stuff’ growing there already (grass, weeds), then you can make it work! Beware the soil that remains bare all. the. time!
  • Not be on a slope – increased chance of erosion
  • Have a soil ph of 6.5-7.0, though this may vary depending on what you are trying to grow.
  • Have a water source nearby – if no running water, consider catching rainwater and pumping it out through a hose.
  • Be close enough for convenience – you will need to maintain the garden and bring the harvest back to your home so is your garden a realistic distance from your home? Will your hose reach your garden location?
  • Be big enough – what do you want to grow? You can grow a large quantity of food in small spaces, thanks to methods such as square foot gardening, interplanting, succession planting and vertical gardening. But it is helpful to know how much room you need based on what you want to grow – you don’t want to plant pumpkins and then become shocked when they take over half of your backyard and shade out the rest of your garden! I will be happy to help you with garden planning if you have questions.

You may find it helpful to get a soil test done on your soil, which will give you an idea of soil pH and any areas the soil is lacking in providing nutrients needed for plant growth. If your soil is in need of fertilizer, the biology in your soil is lacking. Often times, adding compost will help the soil food web come back to life and find its balance, so the nutrients your plant needs are released as soon as they need them. This can only happen when you have the right kind of bacteria and fungi present (they are found in compost!), to be eaten by protozoa, nematodes (beneficial ones, anyway), and invertebrates, which will release nutrients in a plant available form. Compost is a magical substance that you can create right in your own backyard and eliminate your need for purchased composts and fertilizers.

What kind of tools do you really need?

Sometimes, the cost of starting and maintaining a garden makes people decide not to start a garden after all. Having to buy all those tools, a ground cover or wood for a raised bed, compost, top soil, the seeds… If you are trying to grow food to save money, you may not have a lot of money to throw into starting a garden. I hear ya! If you feel gardening has to be expensive, may I humbly ask you what you feel you really need?

I will warn you that I am a very basic person. My goal is a functional garden that grows a lot of food. To do this, you don’t need much.

The very first year I started a garden, I did a few things wrong, financially speaking. We rented a tiller, purchased seedlings, purchased mulch, and popped it all in the ground. It was rather spur of the moment, and I think had I had time to plan a little better, the garden could have been much more affordable. I am posting this type of an article now, so you have all winter to plan and ponder your future garden. Every year since then, my garden has been grown using more affordable means.

My most frugal garden required a shovel, a hand tiller, hose, a trowel and seeds. I turned over the dirt in my small backyard gardens by hand each spring. My gardens were about 12×19, and some were smaller. I had several spots through the front and back yard. Once I turned the dirt over, I planted the seeds or the seedlings I started from seed. I used a hose to water. I had rabbits at the time, and used their bedding as compost and mulch throughout the garden. The nice thing about rabbit manure is that it isn’t ‘hot,’ meaning you can put it right from their cage into your garden without needing to compost it first.

The most common tool I hear people worry about being able to afford to have access to, is a tiller. It wasn’t until a few years after my first garden that I began using one – and now 15 years later I am using one much, much less! I can assure you it isn’t necessary.

My garden tool collection has added on over the years, but I still find myself using the basics each year. If you choose to start to seeds yourself earlier in the season, you will need different supplies, such as a quality seed starting mix, plug trays (they hold the dirt and seeds), a way to water the delicate seedlings (a spray bottle if you only have a few, or a small compressed air pump sprayer) and most likely shelving of some sort and lighting (regular shop lights work just fine for seed starting).

If your budget allows, you may find a stirrup hoe a great add-on for weeding. A rake is helpful for raking up leaves and debris, and maintaining the mulch on your beds.

The bare basics:

  • Spade shovel, hand tiller or walk behind tiller – or neither of these if you prefer a no-dig garden. See ‘Do you need a tiller?’
  • Trowel
  • Hose or watering can
  • Seeds/Seedlings
  • Ground cover of some sort – cardboard, mulch, and organic matter/compost. Some years I simply used grass clippings and/or leaves.
  • A journal/notebook for record keeping

Nice to Have:

  • A garden hoe, I recommend a stirrup hoe for weeding
  • Rake
  • Seeders
  • Row markers/string
  • Compressed air sprayer, plug trays, seed starting mix for starting seedlings indoors
  • Knee pads and a tarp to sit on
  • Garden gloves (helpful for prickly weeds!)
  • Steaks/trellis/tomato cages/step-in posts with wire

When it comes to acquiring these tools, I highly suggest looking in places like thrift stores and yard sales. I have found a lot of my tools that way. Also, look on craigslist for used tools, word of mouth, and the buy/sell groups on Facebook. Maybe a gardening friend would be happy to let you borrow tools as you need them, so that the lack of tools won’t stand in the way of being able to try gardening!

What would you change on this list? What tools do you use every year?

DIY Garden Journal

I love keeping records.  They have helped me in so many ways.  I keep a binder for most every aspect of my farm.  I will focus on my garden journal here. As my needs change, so does my garden journal. It’s never quite the same year after year, but here are the things that are always included in it:

  • I know when I started my seeds the year before last and how well they did, what their conditions were, when they started to sprout, the percentage of how many made it in the ground, and how the plants did through the season.  I jot down notes nearly daily about what I did and how my seedlings are doing, maintenance in the garden, compost applications, etc. etc.
  • I keep track of experiments.  That way, when I try to remember how my potatoes in 5 gallon buckets experiment went, I can remember.  When I wonder when I planted my beets the year before and how the weather was, I can better prepare the next year knowing that they survived despite wintery weather.
  • I can track my expenses.  Then I can see how much money seed saving is saving me because year after year I try to save different types of seeds.  I can also see how much I spent on nursery trays, starter soil, etc. and see savings the next year when I re-use them and begin to make my own starter soil.  I can track what vegetables sold best, how much I sold, how much profit I made, and prepare myself better for the next year.
  • I keep track of harvests.  I can guesstimate how many tomato plants I need based on the previous seasons planting.  Of course different weather and watering conditions can affect yields, this is just an estimation.  I can also see that “x” number of plants yielded “x” pounds of tomatoes and what I did with them – this helps me better prepare my pantry by taking inventory before canning season to see where I need more of what.
  • I keep track of my schedules.  Spring, summer, and fall gardens.  Succession plantings.  This helps me prepare mentally for the season ahead so I know when seeds need to be started, how many, and I can keep things rolling smoothly.
  • Charts.  I love charts.  I have a section in my binder devoted to charts I have found on the internet.  Charts that tell me, approximately, how much of what vegetable I should grow per person, how many seeds I need for 25, 50 and 100ft. rows of vegetables, planting schedules, companion planting, estimated yields, and lists of what vegetables belong in what family to assist with proper rotation,etc.
  • Inventory.  Perhaps the “bread and butter” of my journal.  I keep a spreadsheet of what seed packets I have, the size of their packet, approximately how many seeds per pack, my goal for planting, list price and what I paid.   I highlight the heirloom varieties so I know what seedlings need to be marked, covered at times to prevent cross pollination, and can keep a general eye on them as these varieties I try to save my seed from, to use the next year.  I don’t yet save seed from all my plants, but I do hope to reduce my seed costs each year by expanding the plants I do save seed from, learning a few more each year.
  • Seed saving notes – I can keep track of seed saving techniques, make note of what plants I am going to save seed from,  and track what I save through the season for next year.
  • Planning – I have a section with graph paper and notes so I can plan out the layout of my garden.  I will be rotating so it will be helpful to keep track of where I planted everything year to year.  I also want to be sure my taller vegetables aren’t shading my shorter vegetables.  I want to make sure the things planted near each other are companions.  Being able to graph all of this out is helpful, so I have a basic idea of where everything should go, how long I want my rows, how many of each veggie I can put in each row, how wide my aisles should be, etc.

You can create your own garden journal using a word processing program such as Microsoft Word or the open source Open Office. If you google terms like ‘garden journal’ you will find lots of pages you can print for free. Others have made their garden journals available for a small fee so most of the work is done for you.

You can buy dividers, or create your own. I like to sub-divide my sections further, so the main category is listed along side the vertical edge of the binder, and the sub-divisions are at the top of the page, horizontally. I tape the name of the category to a piece of cardstock to give the divider some strength.

These can be as elaborate or not as you wish. Some years I will simply use a planner from the store. I summarize what I did in the garden on a specific calendar box, then lay out all the details in the lined pages set aside for the weeks happenings. Sometimes I need to add pages, so I will staple them in or use paper clips. The end of most planners usually has several empty, lined pages. I use those for ‘at-a-glance’ type things.

If you keep garden notes, I would love to hear how you do it!

Do you need a tiller?

Gardening and tilling go together like peanut butter and jelly. But should they?

Every spring, tillers are pulled out of storage or rented, and started up all over the country as gardeners begin to break ground for their new garden season. Tillers will produce a flat, empty, often eye-appealing new slate that is fun to put new seedlings or seeds into. Every fall, gardeners typically till one last time to distribute compost, grind up the seasons plants so they can decompose over the winter, and prepare their garden for the long winter months.

Maybe you don’t have access to a tiller, and it is preventing you from starting your garden.

Let’s take a minute to talk about tilling, and decide if you really need one or not. If you decide to go with raised beds, a tiller is unnecessary. But if you have in-ground beds, you may discover it isn’t necessary for that, either.

Your need for a tiller will depend on a few things. If you are preparing a garden spot in the fall, you could till the grass and weeds under now, cover with cardboard, some compost and a layer of heavy mulch (you would not be tilling again in the spring). The cardboard will smother weeds for now, break down over the winter, the mulch will settle, and the compost will decompose. A word of warning though – if you have weeds that multiple through roots – such as Thistle, you would be better off simply hand-pulling and smothering the remaining weeds vs. cutting up the roots, because in some weeds, each bit of cut up root will sprout a new weed. It can quickly turn into a disaster. Even with smothering, you may need to continually top your garden bed with cardboard and mulch for a few years to starve those persistent weeds out but with diligence, they do eventually go away. I would not recommend tilling your soil and leaving it bare over the winter, as rain and snow can badly compact that top layer, leave it open to erosion, and weeds will readily sprout as soon as they can in the spring. That is why I do recommend covering your tilled area with cardboard, compost, and mulch. If those cannot be obtained, you may cover your garden using other means (check out my post on mulch) or plant a cover crop if you have enough time.

If you don’t have access to a tiller, don’t fret! Instead of tilling and then covering the bare soil, you could simply lay cardboard right down on the grass you wish to turn into a garden spot, top with compost and mulch, and let it rest all winter. In fact – I did this early in the spring last year and it worked spectacular – the only issue I had was getting through the layer of cardboard and initial soil was a little difficult because the cardboard hadn’t yet broken down and the soil was still compacted at the top layer- by the end of the season, compaction was gone thanks to the earthworms that took up residence!

In the fall, tilling is not necessary in a no-till garden – simply refresh compost and mulch. If you have a stubborn spot of thistle or another annoying weed that is hard to get rid of, smother it with another layer of cardboard right on top of your existing mulched bed. Top with compost and mulch, and let the smothering continue. It may take a few years, but if you prevent the weeds from going to seed or spreading, the repeated smothering will deplete the plants energy, thus prohibiting its ability to continue reproducing.

Tilling will allow for an instant garden, should you use a tiller in the spring. It will aerate your soil, spread amendments, give you a pretty new slate to plant in, chop up grass and weeds which will break down quickly. It does have some big drawbacks though – it can lead to compaction lower in your soil (which can hamper you roots and lead to bad drainage), slices apart the biology in your soil that keeps it functioning and fertile, bring up weed seeds that will sprout, and destroys soil structure. You should also avoid planting seeds directly in a newly tilled bed, as the broken up fresh green matter can prohibit germination. By the time the soil is ready to plant in, weeds will likely have taken over if you have not yet covered the soil with something.

You can reduce the harmful effects of tilling by tiling only when necessary, add organic matter every time you till, and change the depths at which you till each time to avoid compaction further down in the soil. Also, do not till if the soil is too wet.

Tilling Alternatives:

If you would like to use tillage to prepare your garden, but cannot access a tiller, there are still other options for turning the soil – a pitchfork can be used to turn dirt over (or better yet, simply loosen soil – you can hand pull weeds easily from there), a broadfork, or a hand tiller (may I also advise you that this will be a great workout as you twist and turn! I used one of these for a few years to till my smaller gardens back in the city).

If you choose to try gardening that doesn’t require tillage, I would love to hear from you. If you already prepare a garden that is no-till, or no-dig, I would love to hear about your experiences so far.

Don’t save any old seed!

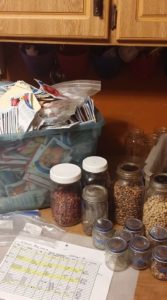
This time of year there are plenty of seeds everywhere. Your broccoli, if left in the ground, has sprouted flowers which have turned into seed pods. Maybe there are some cucumbers that were oddly shaped that were left behind and now have yellowed and are beginning to dry out. Perhaps you lost a zucchini out there and it’s now turning yellow and well beyond the acceptable period for consumption. Maybe your radishes have produced seed pods that are drying. Being new to seed saving, you are interested in saving all the seed you can to reduce your costs next year, right? So out to the garden you go, collecting seeds for next years garden.

Please don’t. I don’t say this to burst your bubble, but to prevent you from having a less than desirable outcome next season. Every year I see people excitedly saving seed from everything in their garden, but this is the only time of year they have even thought about saving seed. Saving seed now, without any prior planning, will not yield the results you are hoping for (in most cases). There are some fairly foolproof plants you can save seed from successfully such as tomatoes, beans, peas and lettuce. They have different methods for harvesting and cleaning the seed, which I will be covering shortly. Saving seed is an intentional activity that should be included in your garden planning- well before any seeds have been started. And there are things to think about for long-term success.

Let me tell you why.

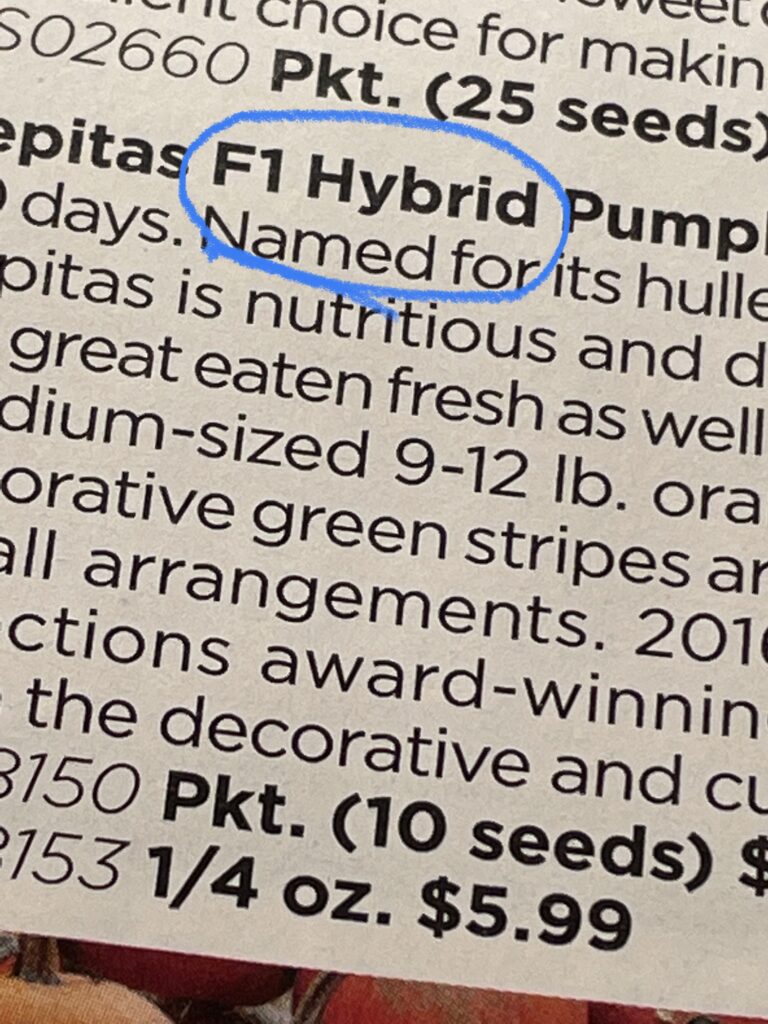
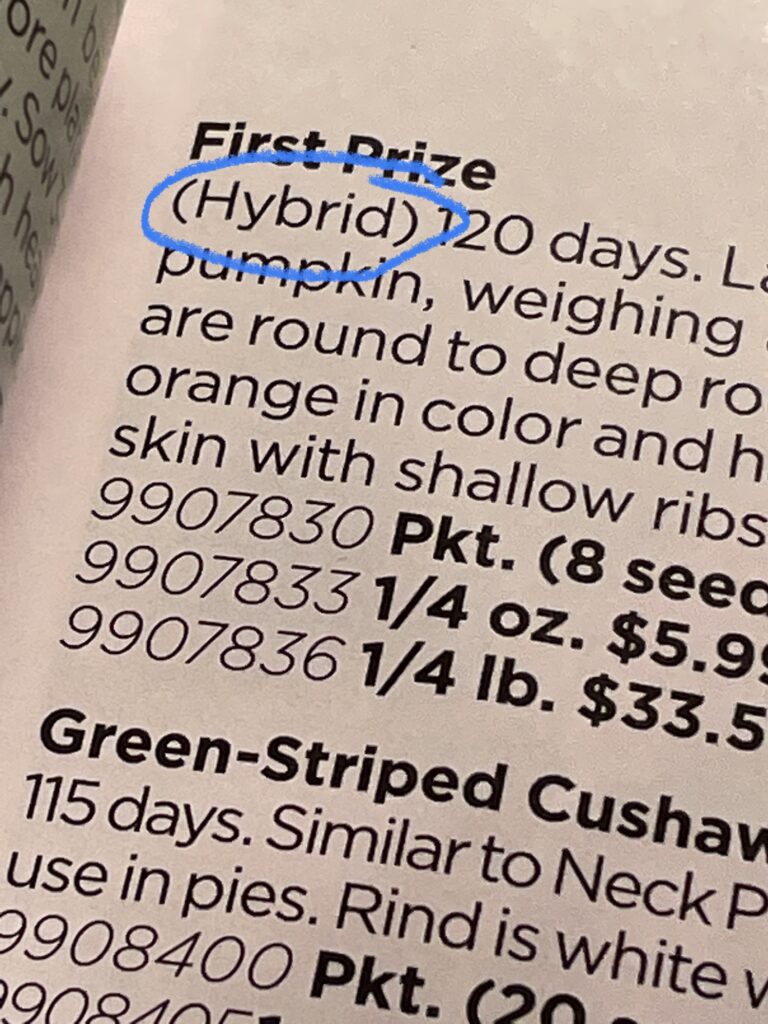
First, the type of seed you originally planted is perhaps the biggest determining factor to seed saving success. The goal here is to grow plants true-to-type, which means if you planted a Roma tomato, you want to grow a Roma tomato with the exact same qualities, right? You are counting on certain characteristics to show themselves again. Do you remember exactly what type of seed you planted and are trying to save? Are you certain that what you planted was open pollinated or heirloom variety and not a hybrid? Hybrid seed is a crossbred between two parent plants. That means if you save that seed, what you will grow next year will not be true-to-type. It may grow. It may even produce. But it won’t be what you expected and might even be disappointing.

Second, do you remember the variety? Us gardeners like to plant a lot of varieties of the same plants in our garden. But knowing what variety you planted is really important. Different varieties have different qualities that you want to keep growing true-to-type and it is important to be able to identify varieties to ensure quality and characteristics are what they should be.

Third, Did you do anything to prevent cross pollination? Some plants are self pollinating, but many are not. Wind and insects are responsible for the pollination – and that could include carrying pollen from different varieties which would then make the seed from that produce a hybrid. The seed will still look exactly the same, but when you plant it, you may notice different characteristics. Even self pollinated plants can occasionally be cross pollinated by insects. Methods to prevent cross pollination between varieties include caging, netting (hand pollination by you may be necessary), blossom bagging, time (if your season is long enough and your varieties allow for it, you can plant one variety early and plant the next variety when the first variety is blooming, so the insects only pollinate one variety at a time), and isolation distance. Isolation distances are often quite out of reach for a home gardener though, so I recommend other methods of isolation. Also keep in mind, even if you are being careful to only grow vegetables that will not cross pollinate, your neighbors may be growing something that will. Some people prefer to keep varieties separated on their side of their property with pollinator distractions in the middle and/or tall buildings or landscape features to interrupt the flow of wind. Both of these are said to possibly prevent cross pollination as insects will drop their pollen elsewhere (with other blooming distractions) before making their way back to the other side of your garden, and buildings or even tall plants like sunflowers, can interrupt windflow and prevent cross pollination there. Another point related to cross pollination is that some weeds from our yard, the neighbors or a nearby field will cross pollinate with certain plants in our gardens too!

Fourth, Are you saving seed from a variety of plants that are growing true-to-type? Did you save some of your very best vegetables for seed saving or did you eat them all? As a seed saver, it is important to pay attention to the plants we wish to save seed from all season, not just at harvest time. And, we don’t want to leave all of the smaller, poorly shaped produce to save seed from – nor do we want to save just the biggest and the best. In fact, the plants that we wish to save seed from have many characteristics that are very important that go beyond the actual vegetable its self. Plants that bolted early, developed blight, have oddly shaped fruit, have smaller leaves, slower growth – these are all characteristics you don’t want to encourage in the following generations. However, a plant with good vigor, one that is slow to bolt, has insect resistance, stockiness, hardiness, uniformity, and earliness are characteristics that you should want to encourage. Select seed to save from those types of plants.

Fifth, Did you plant enough for genetic diversity? Population is very important, but not many people think about it. This is another important factor that needs to be considered before you begin planting seeds in the spring. To avoid decreasing the genetic diversity within a crop, you should save seed from as many plants as possible that have the very best characteristics (remember, this goes beyond the vegetable its self). Maintaining genetic diversity within your plant population is important for continued evolution and adaptation to changing conditions in their environment. So, instead of looking to save seed only from the plants that produced the biggest and best vegetables, aim to select a large number of seeds from plants that have the qualities desired in the variety you are growing. Even though it may not have produced the biggest and best produce on every plant, perhaps the plants are still true-to-type and display the characteristics that you wish to encourage. There are a minimum number of plants that should be grown of certain varieties to ensure genetic diversity. Genetic diversity probably won’t even be something that will affect you for at least a few generations – but ensuring it now will pave the road for your success years from now. If your space is limited, maybe you could form a group with neighbors and share the growing? How neat would that be!

Some plants don’t set seed until the following year. For those, such as beets and carrots, you will need to keep them alive through the winter. In our climate you would need to dig them out and keep them alive in your house before replanting the following year.

These are just a few questions to ask yourself before you save that seed – some vegetables do self pollinate and the risk of cross pollination is low, but as you can see from above there is much more to seed saving than just the seeds. A lot of observation through the entire growing season is necessary for best results, and planning prior to planting to allow for proper isolation and population sizes is very important as well.

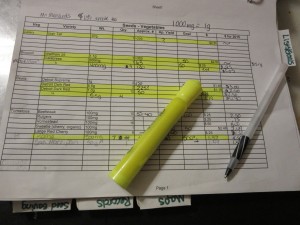
Whatever seed you do save, be sure to label it!! I don’t mean simply ‘tomato’ but, include the variety.

If you are certain you planted open pollinated or heirloom seeds, and you want to try seed saving just to try the process (and have a good chance at success), you can start with common beans, peas, tomatoes and lettuce. Heck, you could try saving the seed of anything really, but please do so knowing that it may not produce the results you are hoping for. I just wanted to give you some questions to ask yourself before you run out to save seed that might not end well for you.

I will be covering much more about seed saving and teaching a class sometime later in the winter, giving you plenty of time to think about the important factors and to help you with your spring planting. I have been saving seed in my garden on many things for many years and while it has been a little extra planning, planting and observing, it has helped preserve varieties I enjoy, saved a lot of money not having to buy the seed, and has given me another step toward self sustainability. I really enjoy it, and I hope you will, too.

Here is an incredibly helpful chart on seed saving that covers isolation distances, population numbers to preserve genetic diversity, pollination methods and much more. Print this, you will want to refer back to it often.

Saving Common Bean Seeds

Here are instructions for saving common bean seeds. What are common beans? snap beans, string beans, wax beans, shell/dry beans, kidney beans, and most garden beans.

If you are growing green beans or other garden beans, by now you may have some left on the vine that have gotten too big to enjoy eating. If you planted an open pollinated or heirloom variety and want to save the seeds to plant back next year, you’re in luck! Let those beans continue drying on the vine until they are dried out and you can hear them rattling inside the pods. Choose to save seed only from plants that have grown well all season and appear true-to-type.

If you are having an exceptionally wet fall or a frost is looming and your plants are still green, you could pull the plants and allow them to dry indoors by hanging them or laying them in a well ventilated area. If you lay them somewhere, turn them often. Hanging is preferred. Leaving the pods attached to the plant allows the pods to soak up energy from the plant for a few extra days, which will result in better quality seed. After a few days of hanging, you may remove the pods and continue to let them air dry, or leave them right on the vine.

Harvesting:

Once your seeds are dry and ready for harvesting, you need to remove them from the pods. This can be done in several ways – place them in a pillowcase and tie it shut, then throw it around the house like a hot potato with your kids. Or jog in place on it. Or beat it with a bat. Once the seed is dry, the pod will fall off in pieces with a light touch, so your goal here is to crush the pod so the seeds fall out. This doesn’t mean you need to drive over the pillowcase with a vehicle or anything extreme, as you might with trying to crack walnuts. To remove the broken pods, or chaff, you will want to set yourself up in the area of a light breeze outdoors or in front of a fan, and pour the pillow case contents into a bowl or container below. Ideally, with the right speed breeze, the chaff will float out and the seeds will fall into your container below. Do this as often as needed to clean the seed.

Another option that might save you the extra step of sorting the undesirable seeds from the bunch is to simply open each pod individually and drop the seeds into a bowl. You will get pretty good at determining what seeds can get dropped in, and what should be discarded. You will want to discard any seed that is not true-to-type – small, shriveled, or any with characteristics that differ from the rest.

Storage:

Store beans in a cool, dry, dark area. Common beans will retain 50% germination for four years.

Remember…

  • Always save seed from healthy plants that appear true-to-type and have produced a large harvest.
  • Leave pods to dry on the vine as long as possible – ideally until completely dry.
  • If you are unsure if the seeds are dry and ready for storage, place a few on a solid surface and strike with a hammer. If it/they shatter, they are dry.
  • Don’t grow different varieties right next to each other. While beans often do not cross pollinate (it IS possible, but rare), having varieties separated will help give another layer of protection.

Building a Compost Cage

One of my goals this fall was to become more intentional with my composting. I have always done a “let it sit” approach, which seems to have worked well – but it also takes quite a while, too. As I learned (and continue to learn) about hot composting, I learned that the compost will be turned quite a bit.

Earlier this fall I build a compost bin out of extra fence posts we had hanging around. It wasn’t a permanent set up, because eventually we will use the posts as, well, fence posts for pasture. But they could serve a purpose now, by holding materials for compost. I felt like a kid again, as if I were playing with lincoln logs… haha. I thought it might actually hold my actual compost pile, until I realized how turning the pile worked. I would want to have full access to all the sides of the pile. I could remove the front posts, because I inserted bits of cut up fence post to support the remaining sides – the front posts could just be pulled right out without interfering with the integrity of the bins. But I figured that wouldn’t be enough. So for now, it holds leaves and browns on one side, and greens on the other. Once I use up all the greens this season, it will hold finished compost. If I have any left to sit around.

So a couple of my kids and I built compost cages. We had some woven wire fencing up in a pen that needed to come down. The fencing wasn’t big enough to really use anywhere else but it would be perfect to build a few compost cages from.

This was a great opportunity for math to come to life. We had to calculate the circumference of the bin if we wanted a 6ft. diameter, measure the fencing with a measuring wheel, and cut. But before we cut, we needed to measure the whole length and find out if we could get more than a couple compost cages out of the length of fencing – at some point I would want more than one going at a time. So, we measured length, divided by our needed circumference, and found out we could get about 4 cages. We rounded the circumference to make them all about the same size, then cut.

Before we began putting the cage together, I piled all of our fresh ‘greens’ into the garden aisle and had my daughter run the pile over with the lawn tractor to chop it into bits. Having everything in small bits leads to more surface area and quicker composting.

After dragging them out to the garden, I used zip ties to secure the ends together (this was a mistake), set it up as round as I could, and began layering the cage with my browns, greens and manure. Using Elaine Inghams method, this worked out to be 60% browns, 30% greens, and 10% manure. We counted how many rows of wire were on the fencing and discovered there were 12 – so if we filled the cage up to the 10th row, we could divide the compost layers up based on the height of each row – two rows of brown, 1 row of green, a thin layer of manure, 2 rows of brown, 1 row of green, manure, repeat. Some people also use 10, 5-gallon buckets to get the right amounts, but you would need do that quite a few times in order to have a pile large enough to heat up enough.

I mentioned using zipties as my mistake – they hold just fine, but when it comes time to turn the pile, I will need to remove the cage. Remember how I mentioned wanting access to all the edges of the compost pile to turn it? Well, to turn a compost pile, the top goes on the bottom of another cage, then the outsides go to the inside, and you will the outside of the cage up with what was once the inside. So in order to use my original compost bin made of fence posts, I could be limited on three sides. That is why I built the cage. My plan was simply to cut the zip ties and unwind the fencing but after a few times that creates a lot of unnecessary waste. So now, my plan will be to use bungee cords!

Making a compost cage was very easy and very quick – and will be very effective. Hopefully you can do the same!

End of Season Reflection, 2019

Once the garden is tucked away for the winter – or close to it – my mind always wanders. I ask myself questions like:

  • What problems did I struggle with this year?
  • How did I handle them?
  • What will I do differently next year?
  • What did I learn this year?
  • What will I try that is new next year?
  • Did I like what I grew this year?
  • Was it enough?
  • Were my seeds started on time?
  • Did my plants grow and mature on time? If not, do I know why?
  • What do I want to try next year?
  • What won’t I grow next year?
  • When did I feel most overwhelmed and how did I handle it?
  • How can I prevent that next year?

Every year we all have many opportunities to learn and grow from our experiences. In most cases, we learn the most from unexpected scenarios and our failures. I try to never look at a failure as a negative thing.

Many of us struggled with getting our gardens in this year, and getting them off to a good start because our spring was unusually wet and cold. It wasn’t until May or June that I could even get into my garden to do much – and I generally start readying beds in March. Overwhelmingly this year I am hearing disappointed gardeners complain about the year being a failure and hoping next year is better. I have to agree with you that I hope next year is better, but I am looking at this spring as a learning experience. We were dealt with more rain and cold than I can remember ever having in the years I have been gardening. But I learned how to deal with it. I learned that, even though I felt like it was too late, my garden still produced despite not getting things planted when I thought they should be. I learned that when I was thinking, “Oh, it’s too late, but I am going to plant these anyway and just see what happens” it really wasn’t too late because that stuff produced just fine. I learned a lot about patience. I am not a very patient person when it comes to gardening. I am the one watching the nighttime lows in March and April to determine how much I should press my luck for pre-last-frost-date summer planting. I learned that I had to be patient this year because if I worked the soil, it would compact because it was so wet. This was a great learning year.

I did experience failure to a bigger degree than normal – the very wet conditions were not very good for a lot of things I planted. Some seedlings I had to plant and hope for the best because they were outgrowing their containers and I had nowhere else for them to go. Generally, things would normally be in the ground weeks before when I actually got around to planting them, and I started my seeds at my usual time, so these were some pretty big seedlings going in.

My beds were not ready to just drop and go this year. Last year got the best of me and I was not able to refresh all of my beds in the fall like I normally did. The extra rain gave weeds a foothold before my seedlings ever got in the ground, so I was dealing with an abundance of weeds right from the get go. This year I am being proactive in making sure my no-dig beds are refreshed with mulch this fall, so that I am not battling a weed issue next spring like I did last year. I am convinced next year is going to be much better. The mulch had decomposed to the point that it was essentially bare soil on top in the spring, which wasn’t good for handling all the rain or suppressing weeds. I find it funny that last season, my garden was kept up on beautifully – and I had given birth that June!

What I will say about my no-dig beds is that pulling the weeds from the beds was SO easy. It seems as though all the microorganisms underground are behaving like they should and earthworms are abundant, and together they are working to keep the soil loose. Pulling up weeds is so easy that my kids actually enjoyed helping me weed this year. The only issue with pulling all the weeds and plants as I close beds this fall is my aching back from all the bending over – but the plants themselves are coming right out with a robust root system full of earth worms. I shake the worms and soil off, often ripping off the roots and putting them back in the soil to break down.

We did have some successes this year – I tried Amish Paste tomatoes for the first time and fell in love – that variety is a keeper. In fact, I planted enough plants for diversity and saved enough seed that I should have plenty for next year. I planted a few rows of tomatoes that didn’t give me much hope at all – I must have gotten a bad bag of starting mix or something because right after I transplanted into bigger cells, most of them started to die. The seeds I started in this same mix also did not do so great. I did try a different brand in order to save a buck and I think I learned my lesson. Anyway, I put them in a few rows and didn’t really think anything of them. They were looking so sad. But believe it or not, the very next day they actually perked up! They turned out to be the best producing rows of tomatoes. Our acorn squash did great, along with herbs, gourds, celery, cantaloupes, okra, brassicas, onions, and others.

Our peanuts and peppers did not do well. The bell peppers were strangled and drug out of their neat little holes by my ducks, though the banana peppers did alright, and the peanuts did not have the warmth they needed to do well. I had started them indoors 6 weeks before our last frost date as suggested for northern states but, our spring wasn’t the kindest to warm-weather crops and it stunted the peanuts and made them very weak, so I went ahead and cleared the bed.

I am still waiting to see if my brussels sprouts do well (they are developing nicely!) and if my artichokes will produce. I’ve never grown artichokes. They were another ‘new this year’ thing to try. The plants are nice and big.

So plans for next year include more tomatoes – last year I grew about 600. This year I probably had 200 or less. I will guard my spring plants a little better from meat birds next year (you may have read my struggle about keeping my meat birds contained and how they ate almost my entire spring crop?), I will plant more peppers overall (last year I planted about 300 – it was a GREAT year for peppers). If these numbers shock you, don’t forget – I have a large family (8 kids). I don’t grow produce to sell, at least right now – I just want to feed my family from one harvest to the next with as much homegrown food as I can! We do a ton of preserving through canning, dehydrating and freezing. I will try peanuts again. I want to do more peppers and winter squashes.

I have maps of my garden that I like to play with over the winter, labeling what I figure I will plant, and look back on previous years maps to allow a fair enough rotation cycle to cut down on problematic pests and disease that can pop up when the same plants are planted in the same place from one year to the next. That is always the fun part. Along with that I will include a running list of the seeds I will need to have on hand – and closer to ‘go time’ I will check my inventory list to see what I have on hand and what I actually need to buy.

Maybe I should put together a meet up on record keeping, mapping and whatnot over the winter? Or would that be totally boring? Let me know. And – what are your reflections on this year? I’d love to hear your successes, failures and learning moments!

September Ramblings, 2019

September has been such a busy month. I feel like I am flying by the seat of my pants most times – the farm is in the beginning stages of winding down so instead of just maintaining, we are now harvesting plus winterizing on top of maintaining. Our children are back to school – we homeschool, so that means lesson planning and teaching 6 of the 8 who are school aged. My kids are not the only ones learning though – this momma has found a new passion of her own: the soil food web.

You know when you find something that unlocks a whole new world for you – maybe it’s a phrase, maybe it’s an inspirational speaker who speaks about something in a different light, whatever it is, but it is life changing even though it deals with a topic you are already passionate about? I experienced that. Soil health has always been a focus of mine in my garden. I have always understood that I want to keep my garden as natural as possible. I want to protect the soil with a mulch, I want to treat problems with natural solutions that won’t kill more than my intended subject, I wanted to encourage beneficial insects and earthworms and snakes and spiders. Happily, all of the things I had been doing all these years had me on the right track – but I was able to unlock a whole new level of understanding that kept me up for hours nearly every night studying. I was studying the soil food web, and more detailed information on composting, and how to assess your soil with a microscope. I have tied up so many loose ends, answered so many questions I had lingering in my mind, and understand soil health as a whole on a whole new level. The way I think about my garden isn’t changed much, but my passion has grown tremendously! There is so much we can do to encourage microorganisms, make plant food available to plants, and change and understand the dynamics of how and why things grow the way they do!

My moms present to the kids this year for their birthdays was a nice microscope. Once I learned I could assess my own soil with our own microscope, I was so excited for its arrival! I took samples from a few beds and looked at them under the microscope right away. I was amazed to actually see things moving. My soil was alive! And it should be. I am so encouraged and inspired by all I have learned I cannot wait to share it with you! The microscope came with a camera, so I hope to share pictures of the things I have learned about.

Aside from the exciting, new revelations, we began putting parts of the garden to bed for the year. As crops are harvested, the weeds and plants are pulled up. A new layer of compost is spread on the beds, then we will begin laying mulch over the beds. Not all of my beds are no-dig, but the majority are transitioning. The sunflowers are done being beautiful, so I have my boys going out and cutting the stalks down, then removing the heads. They will probably use the stalks as spears of some sort – hopefully not on each other – and we will make some bee hotels out of them. The seeds are dried and most are fed back to the livestock we keep, and a portion are kept back to plant again next year.

The strawberry beds are being thinned and new beds are being made. Raspberries are being pruned. Okra and other vine-ripening seeds for saving are being let go now to mature for seed saving. I built a large compost bin out of fence posts for the storage of aged compost and leaves, and am creating compost cages out of fencing to do the job of making compost. I will post all about that probably next month once the cages are completed and put to use.

What kind of jobs did you find yourself doing during September?