Picking the right onion (and growing guide)

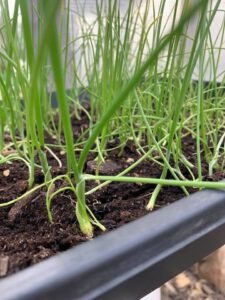
(just a quick note, I’ll update this with pictures through the season as onions get bigger, I am working with the pictures I took from last season, which apparently ended with transplanting, lol)

If there was ever a confusing vegetable to pick out, I think onions would take that title. Onions are classified by their shape (flat, round or globe), or color (red, white, yellow), pungency, how well they store, and how the bulb responds to different lengths of daylight.  Onion varieties are suited for different climates, and come with descriptions such as “short day” or “long day” or “intermediate day/neutral.”  To complicate things further, you can grow onions from seed, seedlings/transplants, or sets.  Some are considered sweet, others are considered storage… What does all of this mean??  To someone who has never grown onions before, this can be very confusing.  This new gardener may just pick a variety blindly, then grow it unsuccessfully because it wasn’t well suited to their climate.  Don’t be that gardener! Let’s talk a little bit about picking the right variety for you, and how to grow them, because they all grow the same (and that’s the easy part!).

Fun fact:  Onions grown for their immature green stems are called bunching onions or scallions.  You can harvest any onion early and use it as a bunching onion!  But, bunching onions left in the ground too long won’t always produce a large bulb.

Let’s settle the confusion on long, short, or intermediate day onions.  This refers to the type of climate and amount of sunlight the onion grows best in.  The amount of sunlight is important, because that is what causes the bulb of the onion to form.

  • Long Day: These onions require 14 hours of daylight or more in the summer, which occur from zone 6 up to the north.   The long day onions are best suited to our area. Long day onions can be started indoors in late winter for a mid to late summer harvest, and generally mature in 90-110 days.  You can have success with these onions in our area if we have the right kind of summer.   If we don’t, your bulbs may not be as big as they could be.  Common varieties include:  Walla Walla, Red Cipollini, Southport Globe (red and white), Sweet Spanish (white and yellow), among others.
  • Intermediate/Neutral Day: These onions are best suited where they will get 12-14 hours of sunlight each day.  They generally mature in about 110 days.  Plant seeds indoors in early spring for a mid-late summer harvest.  Common varieties include: Candy Onion, Early Yellow Globe, Australian Brown, White Portugal, Southport Yellow Globe, among others.  The intermediate day onions are sort of a ‘buffer’ between long and short day onions and tend to grow decently in either a well as their own area. 
  • Short Day: these onions are best suited for zones 7 southward, where they will get 10-12 hours of sunlight per day and generally mature in about 110 days.  These varieties don’t generally do well in our area, but you can try grow them.

Next question is, should you plant seeds, buy seedlings, or sets?

If you plant seeds, you have a wide variety of onion varieties available to you.  You can choose from some at garden centers/greenhouses, or order from seed suppliers online.  You will usually end up with more seeds than you will have room to start/plant, but they can be saved for the following year.  Onion seeds are good for 1-4 years when stored properly

If you grow seedlings, or buy transplants, your onion plants will have their head start, all you will need to do is set them in the ground when the time is right.  Selection on variety is limited this way, but if you don’t have the ability to start seeds indoors yourself, this is the next best thing.

Onion sets are another way you can grow onions, but varieties are extremely limited in stores.  Sets are onion plants (small bulbs) that were started the previous year.  Onions that are in their second year are preparing to set seed, so the onions will not grow very large.

Growing

Onions are one of those vegetables that are best started indoors in our location – and start them indoors early!  I start mine mid to late January for a summer harvest, but you could wait until about mid-February.  Onions can be set out 3-4 weeks ahead of our last frost date, of course weather permitting (if there is still snow on the ground, that’s a good indication that it’s still a bit too soon, haha), and many require a long growing season.  Being able to get them started indoors gives them the opportunity for a head start for the best quality onion possible.  

For indoor  seed starting specifics, visit this post.   Onions follow the same basic guidelines of:

  1. Select a seed starting container that will tolerate moisture, is the right size, and has drainage holes in the bottom.
  2. Fill the container with seed starting mix or potting soil, then lightly press on the surface to create an indent.
  3. Onion seeds can be started indoors 8-12 weeks before you intend to put them out.  They may be able to be put outside 3-4 weeks before your last frost.  This can mean starting them indoors 16 weeks before your last frost.
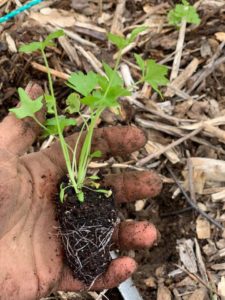
  4. Place your seeds in the indent.  You can sow single seeds per plug or cell, or you can multisow them – 3-5 seeds per hole.  Onions are one of the few plants that can be multisown quite easily to conserve space, their roots generally separate very easily with minimal damage to transplant.
  5. Cover the seeds with an thin layer of soil, cover with plastic wrap if you will be starting them in a very dry location that lacks humidity, keep the soil around 60-70 degrees (F).
  6. When seeds begin to sprout, begin placing the seedlings within 2-4 inches of an overhead light, such as a fluorescent light, 12-16 hours per day.
  7. When your onion seedlings get to be a few inches tall and the tops start tangling with the others, it’s time to give them a haircut.  Each time you give them a “hair cut”, it forces the onion to put energy into growing roots, which in turn will help grow bigger bulbs.  Trim the onions to about 1-1/2-2 inches with a pair of scissors.   Do this several times before planting them outside, allowing them to get a little taller with each trim.
  8. If your onions roots begin to get crowded transplant them to a larger container. 
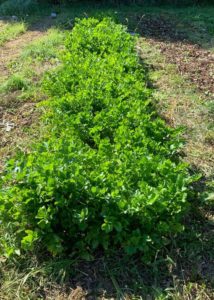
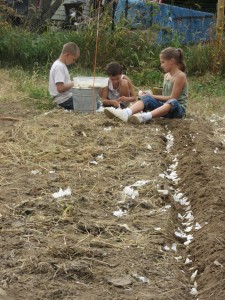
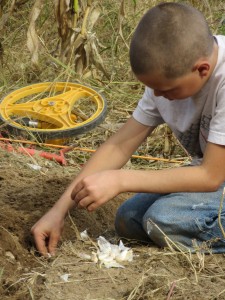
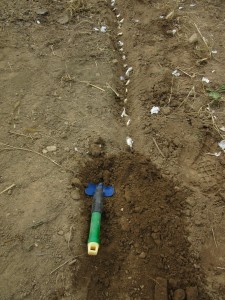
  9. When the weather is favorable for transplanting, begin to harden seedlings off and transplant in loose soil, 2-4 inches apart  I like to dig my rows and line the rows with aged compost that will help give the onions a great start in their new home.
  10. Weed control is important, as is moisture.  To prevent a lot of weeds, you can plant leafy greens in the rows between the onions.  They will provide shade over the soil, which will deter some weed growth.  The shade will also help the soil retain some moisture as it won’t be baked away in the sun. Mulching is also beneficial.
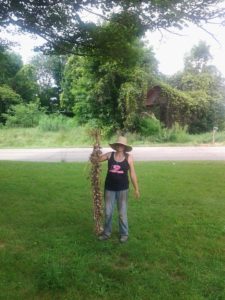
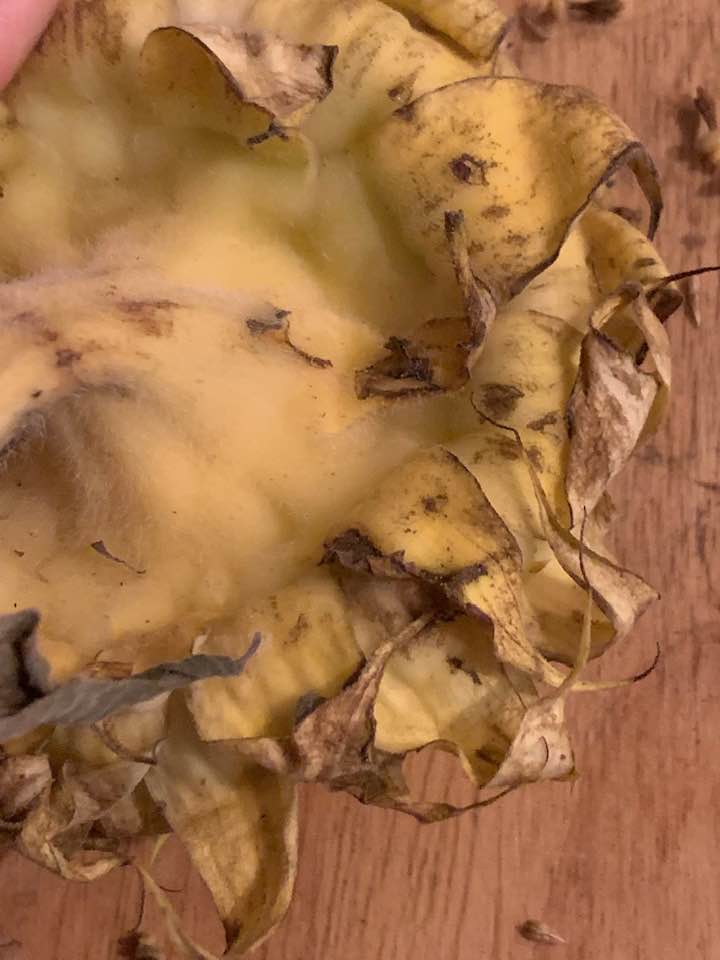
  11. Harvest when the tops fall over, when the majority of the leaves are dry. Leave 1-2 inches of stem on the onion, then spread them in a sunny or dry location to dry (about 3-7 days).

What onions are your favorite?

Growing Celery for Your Home Garden

Celery is one of those vegetables that is seldom grown in backyard gardens.  It’s near impossible to find seedlings at the store, and they are finicky to start from seed.  But if you have success, you will be able to grow your own crisp, delicious celery – organically.  Celery you purchase from the store is one the “dirty dozen” list due to the amount of pesticide residue on it!

I have been growing celery in my garden for the past 5 years. The first year of course was hit or miss, but with continued practice, last year I had a whole 50-ft bed stuffed with celery.  It was WONDERFUL!

I will share a few things I have learned over the years.

First, a few tips I want to tell you right off the bat:

  • Finding celery seeds locally has been difficult.  I found them once or twice, but they are definitely not part of the annual display at local stores each year.  I order them.  My favorite variety is Utah Tall.
  • Celery seeds prefer cooler temperatures.  For germination and early growth, they prefer 60F degrees at night, and up to 70/75 during the day.
  • Temperatures that are too hot can cause celery to become woody and bitter.
  • Celery seeds do need light to germinate, and do not need to be covered with soil.
  • Celery seeds do need consistent, constant moisture. Not soaking wet, but moist (sorry if you abhor that word!  lol)
  • It takes a while for seeds to germinate!  It can take 14-21 days.

To start your seeds 10-12 weeks or so ahead of your last frost, place your potting soil in whatever container you will be planting them in.  I try to get one seed per spot, then gently water the seeds into the soil without covering them purposely.  Then I set the seeds in my basement greenhouse with plastic wrap over the top to retain moisture. I will set the seeds under light

I prefer to plant them in plug trays, where they don’t have much room to grow, and transplant them to bigger containers when they are two inches tall.  My reasoning for this is, celery seeds are tiny and difficult to place just one per spot.  Pricking them out to transplant allows me the chance to separate or pinch off the weaker seedlings so they don’t crowd the one I want to keep.  Doing this all from the same container  can be tricky with an overhead view because the seedlings each grow multiple baby stalks and it can be difficult to tell them apart without the ability to lift them out of their containers.  Once I transplant the one main seedling I want to keep, I still keep the seedlings indoors!  They are not yet ready to go outside.

Once seedlings are transplanted, they are still kept in my basement greenhouse where the temperature is kept at their optimal temp and they are kept under lights for a long portion of the day.  From here, they continue to grow until they are about 4-6 inches tall and we are nearing our final frost date.

Celery is a cool hardy plant meaning they can tolerate colder temperatures, but as babies they are still pretty picky.  I like to set them out when the nighttime temperatures are not frequently lower than 40F.  If the nights are still below 40F and days are no warmer than 55F on a regular basis, it may cause your celery seeds to bolt (go to seed) prematurely.  Be sure to take the time to harden them off.  Once the plants are mature, at the end of the season, they can tolerate light frosts well. Mulch your plants to keep the weeds down, space your transplants about 8 inches apart and plant just a bit deeper than they were growing in the pot.  Celery is not the type of plant that you want to plant deep, like you would tomatoes.

Keep your plants watered regularly.  A hot spell or a dry spell can cause your celery to grow hollow, bitter, and/or stringy.  Around their 2nd or 3rd month outdoors, side dress with compost to give them a little boost.

Growing celery in our climate can be a gamble, because we can have some pretty hot summers.  I have found that home grown celery is a gamble I am willing to take! I have grown some bitter celery, but it eats just fine in my opinion.  The bitterness does give it a stronger taste, so you may choose to use less in your recipes.  As you harvest, take the outer stalks and the middle will continue to grow new stalks all season long.

Growing Garlic

Growing garlic is a very easy task that requires very little space, very little preparation, and very little time (depending on how many you are planting, of course).  There are two main types of garlic, and many varieties of each – softneck and hardneck.  Usually the hardneck varieties tolerate our cold winters the best, and the softneck varieties grow best in mild winters – though they are pretty hardy no matter what.  Hardneck varieties have bigger cloves and stronger flavor.  Softneck varieties often have small cloves that are harder to peel, but have a milder taste.

The best time to plant garlic is in mid-October, so right about now in our area. However, you can plant garlic up until the ground freezes! In well draining, loose soil, dig a trench about 3-4 inches deep. Plant your garlic with the root end down and the pointy end up so they are about 2-3 inches below the surface of the soil, 6 inches apart, in rows 12 inches apart. Cover with loose soil, then cover with another 6 inches of straw or loose mulch if you can. The garlic will find its way through a light mulch, and early week control

I like to lay down rabbit manure or aged compost to the area I am about to plant in.  As I plant one row, already dug, I begin digging the next  row, filling the previous trench I just planted, with soil from the new row I am digging.  Make sure the soil is loose in the entire planting area – pretty deep too.  Soil that compacts will prohibit growth of the bulbs.   I make my garlic beds about 3-3.5ft wide. I feel that is a nice width for my personal preferences, having to consider how hard it’ll be to reach the middle of the bed for weeding or other care.

For my 25 ft. rows, I planted approximately 4-5 big heads of garlic per row.   All the kids gathered together to separate the garlic heads into cloves (leave the paper skins on), then we found a rock to space them roughly 6 inches apart.  The pictures above seem to show the cloves a lot closer than that, but there was a lot of paper from the garlic heads that fell into the trenches, too. I think I am seeing the paper from separating the cloves that makes the ‘cloves’ look so close.  We dug a little trench to place the cloves in, pointy side up planted at a depth of about 2-3 inches.  If you prefer making individual holes or aren’t planting a ton and don’t mind individual holes, a dibble is a great tool to use.  Simply insert it to the proper depth (measurements are often on the tool) and it makes a hole for you.  Use one wide enough to easily slide a garlic clove into the resulting hole.  I made mine using dowel rod, cut to length, a point whittled and sanded, measurements woodburned in, stained then sprayed with a protective coating.  Of course, fingers work just fine too.

In the spring, when the garlic sends up shoots, fertilizer is beneficial.  Some like to fertilize or side dress with compost again around May, then you will harvest usually early to mid summer.  Keep the weeds at bay and make sure the soil stays moist, but not soaking wet or the garlic will rot.  If you are growing a hardneck variety, be sure to cut off the ‘scape’ when it grows (they are great to eat – sautee them to add a mild garlic flavor to your food) so your bulb will grow larger.  For another treat, itty bitty garlic cloves can be grown closely together and you can trim the resulting shoots and use like you would chives (I hate waste, so I’ll plant every single clove in one way or another, LOL. These cloves most likely would not grow into a meaningful head of garlic, so they would be planted just for the shoots in the spring).

I wait until most of the green garlic leaves have yellowed before thinking about harvesting.  This way the papery skins have a chance to toughen up before they are removed from the dirt.  Don’t pull them up – gently dig them up with your fingers or a small shovel.  I like to keep the stems on and braid them to cure for a while (3-4 weeks or so) once they are out of the ground.

Harvesting Sunflowers

(I am putting this in the vegetable category because they are normally grown in a vegetable garden, even though technically speaking, they would be a fruit! But I don’t think that is the section many people would check to learn about them, am I right?)

Now that fall is here, the sunflowers have bloomed their beautiful flowers and now they are looking pretty sad. Their heads have drooped, their petals have dropped and if you aren’t quick about it, the birds will start to harvest the heads for you. Sunflower seeds are an excellent snack for both humans and livestock. We grow lots of sunflowers not only for their beauty but also to plant the following year and as an extra source of homegrown feed for our animals through the winter.

When are they ready? Look for:

  • Drooping head
  • Yellowing and browning on the back of the head
  • Outer petals brown, withered and falling off
  • Lack of flower structure – if you rub your hand along the face of the sunflower, the disc florets, or small flowers that made the inner part of the sunflower yellow, should be brown and will rub right off.
  • Seeds are black and white striped and may be beginning to fall out. Immature seed is not striped yet. You will also notice a lo

How do you harvest? The important goal here, no matter which method you use, is to dry your seeds or they will mold and be unusable. They will not be dry coming off the stem unless the end of your summer has been hot and dry. There are two common ways – first, cut the heads with about a foot of stem or so left on it. Tie a few heads together and hang them from the rafters of your barn or garage to air dry. Or, you can remove the seeds right away from the head and lay them out in a flat layer, mixing daily, until they are dry.

When you are ready to remove the seeds from the head, be sure to remove all the inner ray florets. They usually rub off really easily. Then you start to rub out the seeds – once you get a few seeds popped loose the rest are pretty easy to remove.

Once the seeds are out, you will notice you probably have some extra debris from the head in with your seeds. If you spill the sunflower seeds – slowly – into another container while in front of a fan on low/medium, the debris should blow right out while the seeds fall into the bowl.

From here, you can brine or roast your sunflower seeds, but that is beyond the scope of this blog so I will encourage you to ask around or google how to eat and enjoy your seeds! Or you can save them for the following year, or feed them to your animals. Enjoy!

Growing Okra

Many people are surprised to learn that we can grow Okra right here in Michigan. I have been growing it for years and it never fails to be a point of interest during conversation. Okra is very easy to grow here, and quite prolific! We enjoy it sauteed in butter as a side dish, but I grow it primarily for our gumbo!

What you should know: Okra doesn’t like to be kept wet, and doesn’t need to be watered very frequently. Plan to place them in an area of your garden that is on the dry side and in full sun. Add some compost to their area ahead of planting, or plan to plant in an area that a nitrogen-fixing crop grew previously (such as legumes). Soil temperature for both starting seeds and transplanting into are very important, as I will share with you in a moment.

Okra plant

Seed will germinate in 5-10 days, and you can soak your seeds overnight in water to help them germinate quicker. Okra likes hot weather and that is no different for the soil the seed spouts in – plan for that to be at least 75F, but warmer is preferable. My MSU Training Manual tells me it will germinate from 60-105F! That’s pretty warm. Of course, with lower temperatures it will take longer, though germination will eventually happen.

You can direct sow the seed here in Michigan, but you will get a better harvest by giving it a head start as a transplant, and start seed indoors about 4-6 weeks before our last frost and plan to transplant outdoors about four weeks after our last frost. Direct seed about 4 weeks after our last frost also, to allow the soil to warm up and for our weather pattern to be on the warmer side.

If you have seeded in plug trays, you will need to “pot up” your seedlings to a larger container when they are about 2-4 inches tall. This is necessary for proper root growth.

Plant the seed 1/2 – 1 inch deep, one per cell in a plug tray or if planting outdoors you will aim for a seed every 6 inches or so, once seeds have germinated, thin to one every 12 inches. Okra needs 55-65 days of warm weather to produce. Days to harvest are 40-70 from transplant, 80-90 days from seed. Space rows 24-36 inches.

Maintenance: Okra plants will grow to a height of 2-6ft. depending on variety. When the plants are about 4 inches tall, mulch to retain water and suppress weeds. Side dress with compost every 3-4 weeks.

Harvesting: Okra should be harvested when the pods are 2-4 inches long, generally about 5 days from flowering. If you let the pods continue to grow they will become tough and fibrous, and inedible. Pods that are not picked will cause the plant to slow down or stop producing. Pick pods every 3 days or so. While our climate won’t allow for it, okra can be picked for a year if pods are continuously removed.

To Use: Refrigerate okra after harvest. It will last about a week in the fridge. Okra freezes very well, in fact that is the only way we preserve it. You can also pickle okra.

If you did not use your whole seed packet, store it in a dry, cool location and use it again the next year – okra seeds are viable 4-5 years depending on storage conditions.

Okra flower

Harvesting Acorn Squash

I am often asked when it’s the right time to harvest vegetables, so I thought I would write up posts on harvesting vegetables as I pull them from the garden.

Depending on the variety, most acorn squash is harvested within 75-100 days from planting the seed. It can be tricky to harvest because it turns deep green before it’s ready to harvest, and stays green once it’s past its prime. There are two ways to test for ripeness though:

  • Look at the spot on the squash that sat on the ground. Is it orange? A dark orange color indicates it may be ready. On to step 2….
  • Check the toughness of the skin with a fingernail. If the skin resists being poked, it’s ready! If the skin is still tender, continue to wait.

Acorn squash can stay in the field, on the vine, for a few weeks after it is ready to be harvested, just make sure you get it in before a hard frost. Frost damaged squash does not store long at all.

To harvest, use a knife, shears or pruners to remove the squash from the vine. Leave about an inch of vine on the squash. Stored in dry, cool (55 F or so) conditions, these can last 2-3 months! For longer storage, you may freeze or can. If you intend to store your squash, let it stay on the vine a little longer than usual to allow the outer skin to toughen up.

Did you know….? You can roast the seeds of your acorn squash just like pumpkin seeds! Yum!