Time Saving Tip: Use Mulch

Mulched Beds

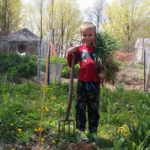
One of the biggest complaints I hear about gardening is that it takes up too much time. All the weeding and watering sure does take up a lot of time. I used to spend hours in my small gardens, pulling weeds, watering religiously, checking plant progress and trying to troubleshoot. I became discouraged because this gardening thing really was taking up too much time. I had kids to care for, a home to take care of, I didn’t even have a job outside the home to add to the mix but I knew if I did, gardening could never happen. I hear this so often, and want to encourage you that there are things you can do to help reduce time spent performing basic tasks.

One thing I have found to be a huge time saver is using some sort of a ground cover – a mulch – to cover the dirt and smother weeds. Over the years I have used various mulches – wood chips, compost, newspaper, cardboard, grass clippings, weeds pulled from others beds, animal bedding (aged at least 8 months), old feed bags, fresh straw, moldy hay, leaves. I have had various levels of success, which I will get into in a minute.

Using a mulch performs several different functions:

  1. Smothers weed seeds, preventing their germination. You may still have some weeds, but they will be far fewer and pull out so much easier.
  2. Keeps the soil moist, as moisture won’t evaporate as quickly.
  3. Aids in reduction of erosion – both from wind and water. Lighter soils can suffer topsoil loss with heavy winds, and gardens placed on a slope can experience erosion due to water drainage. Mulch helps prevent these problems.
  4. If the mulch is of an organic nature, it will break down and help benefit the soil.
  5. Reduces the splashing of dirt and rainwater on plants, which can prevent the spread of disease and keep your vegetables cleaner.
  6. Organic mulches will decompose, adding nutrients and humus to your soil.

There are a few things you should know –

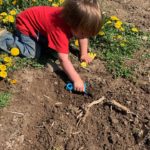
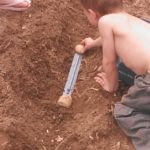
  • Mulch doesn’t work well being placed on top of weeds that are already growing vigorously. You will need to remove those weeds before applying the mulch. I typically pull the bigger weeds by hand, then use a weeding tool to run over the surface of the soil and remove any smaller weeds I may have missed. You could also till the garden bed before laying mulch. If you plan on making a ‘no till’ or ‘no dig’ bed ( a garden bed that is not tilled each year – I will get into this in a later post), use some sort of a barrier as the bottom layer – my favorite for beds that I am going to plant different crops in year after year is simply plain cardboard. For beds that I will not be digging in yearly, such as strawberry beds, I just old feed bags as the bottom barrier. You might prefer some other weed barrier that will not break down such as black plastic.
  • You would apply an inorganic mulch, such as plastic, before transplanting. You then make holes at proper spacing for the vegetable you are planting when you are ready to transplant. Organic mulches should be applied after the plants are well established, unless you are planting into an established no-till bed, then it will already be there.
  • Wet the mulch once you apply it, to help give it some weight that will help smother weeds, and compact the mulch enough that sunlight cannot get through. Or better yet, plan to mulch ahead of a nice, soaking rain. I try to plan as many gardening related tasks as I can before and after a good rain! do make sure there is some moisture in your soil either way, because it will take quite a bit of water to penetrate new organic mulches and water intake will be limited on plastic mulches.
  • Plastic mulches will heat the soil, and organic mulches will act as an insulator. Applying plastic in the spring will help warm the soil and benefit plant growth.
  • You can find most, if not all, of your mulch needs for free if you are creative enough!

Common Mulches:

  • Hay or Straw: Use 6-8 inches, plan on refreshing through the season as they will break down rather quickly. Ideally use moldy, spoiled hay/straw, as you should have less weed germination. You will more than lightly battle with weeds if you use fresh hay or straw. The weeds that do germinate are generally very shallow rooted if you get to them quickly, and pull up easily, but they can be a pain.
  • Grass Clippings: Start with about 2 inches of untreated grass clippings and build up as needed with dry clippings.
  • Leaves: Layer 2-3 inches thick and add new as necessary. Leaves do break down quickly, but they improve the soil also. Do avoid excessive use of walnut or other nut leaves due to the presence of juglone, which can inhibit the growth of your plants. The tree its self and the roots contain the most of it but there are small amounts in the leaves. A small amount should not matter, but if that is your only source of leaves, you may want to consider a different mulch.
  • Compost: 2-3 inches of a well aged compost is beneficial for plant growth, though it may be better off incorporated into the soil or used in conjunction with a barrier of some sort – weeds will pretty easily grow because it is an excellent soil amendment.
  • Wood chips, bark: 2-3 inches is best and provides excellent weed control. It takes longer to decompose, so the need to refresh through the season will be minimal.
  • Newspaper: 2-4 layers will provide good weed control, either shredded or whole. There is a higher likelihood of sunlight getting through shredded paper though, and it likes to fly away when dry so be sure to wet it right away. Avoid glossy inserts.
  • Black plastic: One layer is all that is needed. While it wont’ break down as quickly as organic mulches, it will begin to deteriorate and need to be replaced at least every two years. This will cause the soil to heat up – about 8 degrees (F) in the spring and higher as the summer progresses. To avoid the soil getting too hot and stressing or killing your plants in the summer, you should apply an organic mulch on top of the plastic to avoid direct absorption of sunlight.
  • Clear plastic: Don’t use clear plastic. It creates a greenhouse effect with weeds and provides a great place for them to grow! Heat + Sunlight + Retained moisture = happy plants – and weeds. It is helpful for warming soil in the spring, but remove it before planting.

My Personal Faves:

I have had great success using newspaper with grass clippings on top. The newspaper was quick to break down but provided a great ground cover. The grass clippings added weight to the newspaper which kept it from blowing away or tearing easily. Since we bought our farm, using grass clippings is no longer an option as our only mulch because we don’t create nearly enough of them on our own (I still use them, just not as my only source). I have used straw and hay, and I am not a fan of straw. I do like using moldy roundbales of hay though – I roll those out on a bed I’ve lined with cardboard to create a ‘no till’ bed. The hay is already compressed, so I just have to make a hole and plant through it. Beds that I plan on tilling the next season don’t need cardboard. I like to keep the soil covered whenever possible, and sometimes that happens with weeds I have pulled from another bed when things have gotten out of hand. I pick up trailer loads of cardboard from a local store that discards them, so this is a free bulk source. My favorite way to mulch is using wood chips on top of compost. I don’t till the wood chips in to the dirt, but leave them on top. I don’t till these beds at all. I add new compost yearly and wood chips as needed. We offer to be a drop spot for local tree services who have, thankfully, taken us up on the offer. I age the wood chips a year before adding to the beds.

What if you CAN’T get a hold of mulch for some reason? Maybe you’re too late in the season, or you don’t have a way to bring mulch to your garden, or whatever the reason may be, maybe you need to leave your garden beds bare. Many people do, it isn’t the end of the world. Weeding will be a little more tedious, but in those cases, frequent weeding is essential with the right tool! I can’t stop singing praises about the Hula Hoe, ever since I found it, that $16 dollar tool has changed my gardening life tremendously!!!! Anyway, if you get in the garden every few days or so and lightly run a weeding tool over the surface, you will nip weeds before they have a chance to take deep root. I love the hula hoe because it will skim the top layer of dirt and slice weeds at the soil surface without disrupting the established root system of your vegetables. A frequent and quick skim of your garden beds every few days will keep the weeds at bay.

Do you use a mulch? Do you have a favorite?

Harvesting Acorn Squash

I am often asked when it’s the right time to harvest vegetables, so I thought I would write up posts on harvesting vegetables as I pull them from the garden.

Depending on the variety, most acorn squash is harvested within 75-100 days from planting the seed. It can be tricky to harvest because it turns deep green before it’s ready to harvest, and stays green once it’s past its prime. There are two ways to test for ripeness though:

  • Look at the spot on the squash that sat on the ground. Is it orange? A dark orange color indicates it may be ready. On to step 2….
  • Check the toughness of the skin with a fingernail. If the skin resists being poked, it’s ready! If the skin is still tender, continue to wait.

Acorn squash can stay in the field, on the vine, for a few weeks after it is ready to be harvested, just make sure you get it in before a hard frost. Frost damaged squash does not store long at all.

To harvest, use a knife, shears or pruners to remove the squash from the vine. Leave about an inch of vine on the squash. Stored in dry, cool (55 F or so) conditions, these can last 2-3 months! For longer storage, you may freeze or can. If you intend to store your squash, let it stay on the vine a little longer than usual to allow the outer skin to toughen up.

Did you know….? You can roast the seeds of your acorn squash just like pumpkin seeds! Yum!

Garden Pests: Tomato Hornworm

Let’s talk hornworms. Not very many things in my garden give me the heebie-jeebies, but these caterpillars do because they are just so big. I am getting over it – slowly – but I figure all of you new gardeners deserve fair warning. there are two varieties of hornworms – tomato and tobacco. They both feast on your tomato plants (as well as pepper, potato and eggplant).

Signs and Symptoms… If you notice skid marks and holes on your tomatoes, and poop on tomatoes, and leaves missing from your plant, wilting leaves in a specific spot, chances are good you have a hornworm eating all of your hard work. There are a few differences between a tobacco and tomato hornworm (number of strips, black margins on markings, color of horn – tobacco have a red horn, tomato have a blue horn), but they both do the same amount of damage. For someone who has a small garden, they can destroy your tomato plants in just a few days. I like to maintain my garden without pesticides, so yes, this does create a little more effort on my end.

Solution: To treat without chemicals, you just have to pick them off (use tweezers if you must) and kill them. My kids are infatuated with them and love to search for them and smoosh them for me. Because of their color and markings, they can be difficult to spot unless you are up close and personal with your plants. Let me share an awesome secret with you… A blacklight flashlight, when used at night will illuminate these critters, making them very visible!!!

Hornworms have about a 4 week lifespan (so luckily it’s not an issue all season long) before they burrow into the ground until next year, where they will turn into a big moth (Hummingbird moth) and lay more eggs. You can search for eggs on the underside of leaves, but search quick because they hatch in less than a week!

Tip: Hornworms sometimes ‘click.’ If you shake a plant and hear the click, you may be able to locate the offender.

Prevention: The best ways to prevent issues include rototilling your beds before planting (to break up the pupae or bury it deep enough to kill it), planting companion plants with or near tomatoes the following year, and rotating where you plant your tomatoes each year. Generally, a 3 year cycle is suggested for all crops.

And no, the hornworms don’t actually sting with their horn. They are harmless and can be picked off by hand. If damage done to your plant is on the minimal side, it will recover just fine.

What can you plant in August?

For those of you who think after you got your garden in, during May and June, that your garden was in and done for the season may be surprised to know that there is another round of gardening that you can take advantage of: Fall Gardening.

You can grow just about anything in your fall garden that you would have wanted in your spring garden. I like to think of a fall garden as my ‘second chance’ when things don’t go as planned in the spring. I think seeds and seedlings grow better because our spring weather is just so unpredictable and by now we are in a pretty regular pattern, the soil is warm, the rains aren’t so cold, and seeds and seedlings just get off to a better start. If only we could wait until now to plant our summer gardens! But alas, winter comes too quick for that – but that cooler weather is what spring crops – cool crops – prefer.

After your summer garden is winding down and bare spots appear from pulling plants, digging potatoes, etc. you can fill those spots in with your fall planting. The benefit to a fall garden goes beyond fresh food later into the season – you can also keep your soil covered with useful plants which reduces weeds and keeps your soil thriving.

Cool weather crops can tolerate a frost, some even taste better after a frost. Cool weather crops include things like peas, greens, broccoli, cauliflower, kohlrabi, beets, carrots. Root crops can actually stay in the ground longer without being affected by a frost, too.

To figure out what you have time for, calculate your first frost date and count the days from the date you want to plant, until your first frost. Then, add up the number of days to germination and maturity from your seed packet. If those days fall within the number of days until our first frost, you are good to plant. Keep in mind that the first frost date is an average and is in no way predicting when our first frost will actually happen – you may get a longer growing season than anticipated. I say if you’re on the fence about planting something – give it a shot! You can cover some plants if need be later in the season to avoid frost damage. Days to maturity may vary according to variety, so if one variety looks like it may take too long, check out another!

What can still be planted?

  • Beets – in fact you can plant these in succession for a continual harvest from spring through fall.
  • Beans – you can also plant these in succession!
  • Brassicas – cabbage, broccoli, cauliflower, kohlrabi. Because these plants are maturing in the cool weather and not rushing to finish in the summer heat, you will get bigger heads and a lovely harvest. They can handle a light frost, which extends their season when nights freeze but days are still nice. *you would want to plant these in early August or late July
  • Cucumbers – pickling cucumbers are fast maturing and will grow well for the same reasons stated for zucchini.
  • Swiss chard
  • Kale, collards. These develop a sweeter flavor after a frost.
  • Turnips
  • Bunching onions
  • Carrots – these will get sweeter as the weather gets colder.
  • Peas – peas hate warm temperatures, but they sprout better in warm soil. August planting is perfect for a strong start! They will sprout in the warm soil, then enjoy the cooler temperatures as the season winds down. The harvest will be longer now than in spring.
  • Zucchini (yep! this fast maturing plant will actually do well in milder temperatures vs. high temperatures and a fall planting can avoid many of the common issues we struggle with every summer such as powdery mildew, stress and pests!)

Later August:

  • Radishes
  • Spinach
  • Lettuces

Happy growing!

Gardening with kids

I figure my first post here could tie in the two things that keep my life the busiest and fullest: gardening and kids.  Or rather, gardening with kids.  The two can go hand in hand, although sometimes you need to be a little creative.

As a little background, we have 8 kids ages 15 down to 1.  They have all grown up with food gardens.  My very first garden started with a mini greenhouse in front of my living room window on a desk, which grew into container gardening down my porch stairs, and eventually into a small plot in the ground in our apartment complex.  We moved to Toledo, and had a garden in the backyard there.  We moved to another city, had another backyard garden, then we finally moved to the country where I have a large garden (about 2 acres) on our 15 acre farm.  My goal is to grow  everything (as close to everything as I can get) that we eat, and considering we eat a lot (and it will only grow as they get older), we figured buying a farm would suit our needs.  From here we not only garden, but raise a lot of our meat, eggs and dairy as well.  My kids are involved in all of it!

When they are babies, I bring them right out into the garden with me in their baby seats or laying on a blanket in shade.  Sometimes I wear them in a wrap if my work won’t be too jolting. They mostly sleep in the breeze; I imagine it’s very relaxing.  We don’t have too much of an issue with bugs, if anything we do get mosquitoes in the evening so I just don’t bring them out then unless I have a bug net to keep them from getting bit.  As they get older and more mobile sometimes I have to resort to a pack and play for periods of time, or a stroller.  They generally have fun playing with leaves or sticks or whatever I can find in the garden that they might find interesting.   I have been known to till a patch of dirt for them to sit in and play with.  Every baby has absolutely loved getting dirty and making a great mess from the time they can sit up.  Luckily they also play well alone and with others so they may not need to be with me in the garden the entire time I am in there (which some days can be hours!).  We usually have an older sibling or two who will take them off the play somewhere else if they get bored.

When they start to walk and understand basic things, that is when the fun happens.  Every child develops at a different rate, and each one has a different desire to please, so what works for my kids may not work for every child.  I have had kids who want to help, and kids who are far more interested in pulling up plants.  When they are helpful and still quite young – about a year to three – they get to help with holding garden tools, watering beds (I don’t expect permission), bringing me items from somewhere in the garden, standing on cardboard to keep it from moving on a blustery day if I am laying mulch on top of it, pulling weeds (perhaps in the garden aisle instead of an actual bed….), digging holes for plants (sometimes not anywhere near established plants – more for them to play, but sometimes they are far more interested in digging a hole to help than just to play so your wording can reflect that!  hehe), placing seed in holes, hoeing, etc.  I don’t expect anything that they do to be to my benefit, and I expect that their attention span will not tolerate more than a minute or two of a specific task.   It’s more for training, fun, and keeping them occupied and not tearing up your plants.  I like to take this time to show them beneficial insects in the garden and let them eat plenty of fresh produce.

As they get older though, they can really become more responsible and helpful.  My six year old loves to bring me cardboard to line garden beds with in a wheelbarrow, strapped to a dolly, or brought over in a wagon.  In fact, he is happy to bring anything to me in anything that has wheels!  He also fills wheelbarrows with grass clippings, mulch and compost.  He will remove clumps of weeds I have pulled from the bed and place them in a container, plant the bigger seeds (such as beans and peas), fetch and unwind the hose, use the pitch fork to loosen up and remove deep rooted weeds in the beds, run wire for trellis, spread mulch and more.  He is the sweetest at bringing me ice cold water on a hot day, and fresh cut wildflowers too!  He is very careful not to step in planted beds, or on newly tilled soil, and tries really hard to identify plants vs. weeds.  They learn to love earthworms and welcome all the garden buddies – even snakes and spiders.

At about age 8 or 10, they really start to shine.  They can run the seeder, actually handle the wheelbarrow if it isn’t too full, water the garden beds, pull the weeds (and not the plants we want to grow), fill the trailer full of mulch, dump the wheelbarrows of compost, roll up the hose, use garden tools responsibly, identify vegetables ready to harvest, describe plant problems, identify vegetable plants based on their characteristics (before they bear fruit), pound fence staples into posts for trellises, dig holes, paint boards, help me map the garden, remember what we planted the previous year when my mind has failed and my maps are lost (hehe), find joy when locating beneficial insects, identify and kill harmful plant pests,

As I garden with my kids, they ask so many questions!  I love being able to answer them and see their appreciation for homegrown food grow.  Sure they grumble a bit when it comes to chores in the garden because it can be sweaty, difficult work.  But I believe this work helps grow character as they do all the things, develop a work ethic despite the heat and grumbling, deepen their understanding of where their food comes from, build responsibility as they are set free with tasks that are not performed under my watchful eye, and also this work brings on a feeling of pride as vegetables they have tended make their way to the table, or make their way into the canning jars.   Oh yes, the canning jars….

Family Traditions: Canning

Yes, they help with food prep after harvest too. Whether we are freezing, canning or dehydrating they are there to help with that process too.

When they are itty bitty (under about age 4) they really just need to stay out from underfoot.  They love to play with canning rings, but they can begin to bring us produce from boxes and buckets to clean up.  Standing on a chair, the older itty bitties can wash produce and help sort.

Ages 6 to about 10 can also clean produce, wash jars, watch for the boil, peel or skin produce, lay produce out on dehydrating trays or fill jars with raw produce, wipe rims and secure lids.  They also bring scraps out to the chickens, pigs or compost pile.  It’s during this age and sometimes younger that I am asked frequently, “Mommy, can I cut this?” And sometimes I might let them.   My then five year old had such a fun time cutting beans with a butter knife – he felt like part of “the gang” and it was so helpful – and I didn’t need to worry too much about him getting cut.

Older kids shine here, too – when I give them a task, they set right to it because they have been helping with food preserving their whole lives too.  By this age they can generally run the pressure or waterbath canner (I always oversee to ensure food is properly preserved), fill the jars, set the jars in the canner, remove the jars from the canner, make the brine or syrup, cut, crush or puree the produce, bring up loads of jars from storage.  They all know how to safely use kitchen knives and have been for years by this time so they can cube, mince, slice, french, whatever the recipe calls for, they are great at it.  If I have to leave the house, I have no problem leaving my oldest kids in charge of the pressure canner as they can safely read the pressure gauge and/or listen for the weight to jiggle, if I have to walk out of the house for something.

It is such a relief to delegate tasks during the busiest part of the year.  It is never too late to get involved in gardening, or food preservation, so if you are thinking of getting started know that kids don’t have to be a stumbling block in your way!  Teach them right along side yourself as you learn and they will become a great help to you as your garden and abilities grow!

How do your kids help in the garden or with the harvest?  What are your biggest struggles?  Please tell me in the comments, maybe we can help one another!

What is a Hardiness Zone?

Gardeners refer to their hardiness zone quite a bit…. What is that?

Our country is divided into certain growing zones, because certain things grow better in some areas than others. As well, something that grows as a perennial in some zones, may have to be treated as a annual in others. These hardiness zones are based on the average low temperatures during the winter. Something that grows well in Florida may not grow well up here in Michigan due to differences in climate, In the US we start at zone 1, and go up to zone 13. If you were looking in a seed catalog to find a plant that would grow well in your area, knowing your zone will help you pick out the plants that are best suited for you.

When looking at seed packets and considering your hardiness zone, sometimes the zones the plant grows well in will be a range, say, zones 3-7. It’s important to make note that if you are trying to grow something in a zone higher than 7, it will not grow well because it needs the dormancy period that winter time provides in those zones.

To find your zone, visit this link and place your zipcode in the box that asks for it. You will notice Michigan is home to several different zones – knowing your unique zone will be very helpful in your gardening success!