Fine Details of Seed Shopping

Seed catalogs are beginning to arrive in mailboxes and gardeners are beginning to feel the ‘itch’ to order seeds.  This week on the farm page, I’ve been sharing tips to help you make the best choices from seed catalog purchases.  The tips I am sharing today are kind of all over the place and also there are too many words to fit in a Instagram post, so, I am putting all the nitty gritty in an old fashioned blog post.  Let me know if you have any questions I can answer.

The Fine Details

When it’s time to shop for seeds, you will often come across these terms or information in your seed search and it’s helpful to know what they are and how they apply to you:

Hardiness Zone–  Seed catalogs may make reference to how well something grows in zone 4, or zones 4-7, or some other number.  What hardiness zone are you?  Our country is divided into certain growing zones, because certain things grow better in some areas than others. As well, something that grows as a perennial in some zones, may have to be treated as an annual in others. These hardiness zones are based on the average low temperatures during the winter. Something that grows well in Florida may not grow well up here in Michigan due to differences in climate, In the US we start at zone 1, and go up to zone 13. If you were looking in a seed catalog to find a plant that would grow well in your area, knowing your zone will help you pick out the plants that are best suited for you.

When looking at seed catalogs and considering your hardiness zone, sometimes the zones the plant grows well in will be a range, say, zones 3-7. It’s important to make note that if you are trying to grow something in a zone higher than 7, it will not grow well because it needs the dormancy period that winter time provides in those zones.  To find your zone, google ‘usda hardiness zone’ with your zip code.

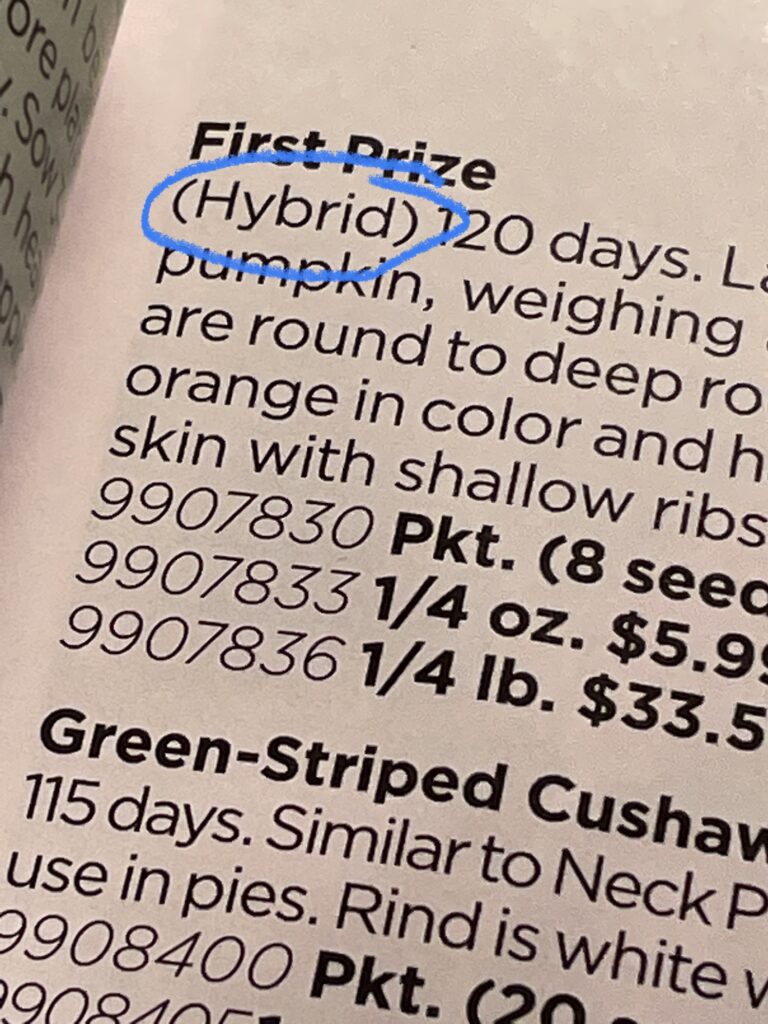
Days to Maturity- This is really useful information especially for those of you with shorter growing seasons.  The days to maturity, or days to harvest, is the number of days that you can expect to pass before your first harvest.  Harvesting happens over a period of time, it doesn’t all happen in one day, so it’s important to note that days to maturity refers to the point at which you can begin harvesting your vegetables.  Of course, weather, soil conditions, etc. can all affect this and the number is not absolute. Also, depending on the seed company that number can refer from the day the seed germinates outdoors in the soil for direct sown plants, but then refer from the day you set your transplants in the ground until harvest, for those seeds you start indoors.  Some seed companies use the days to maturity to refer to the day the seed germinates, regardless of where it was sown.  There is a huge difference in days to maturity between varieties, so if your growing season is short, you may want to look for a variety with fewer days to maturity to maximize how much you can harvest before your first anticipated frost.

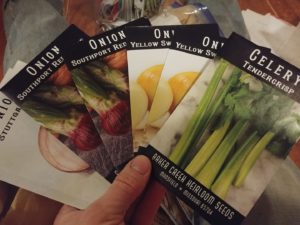
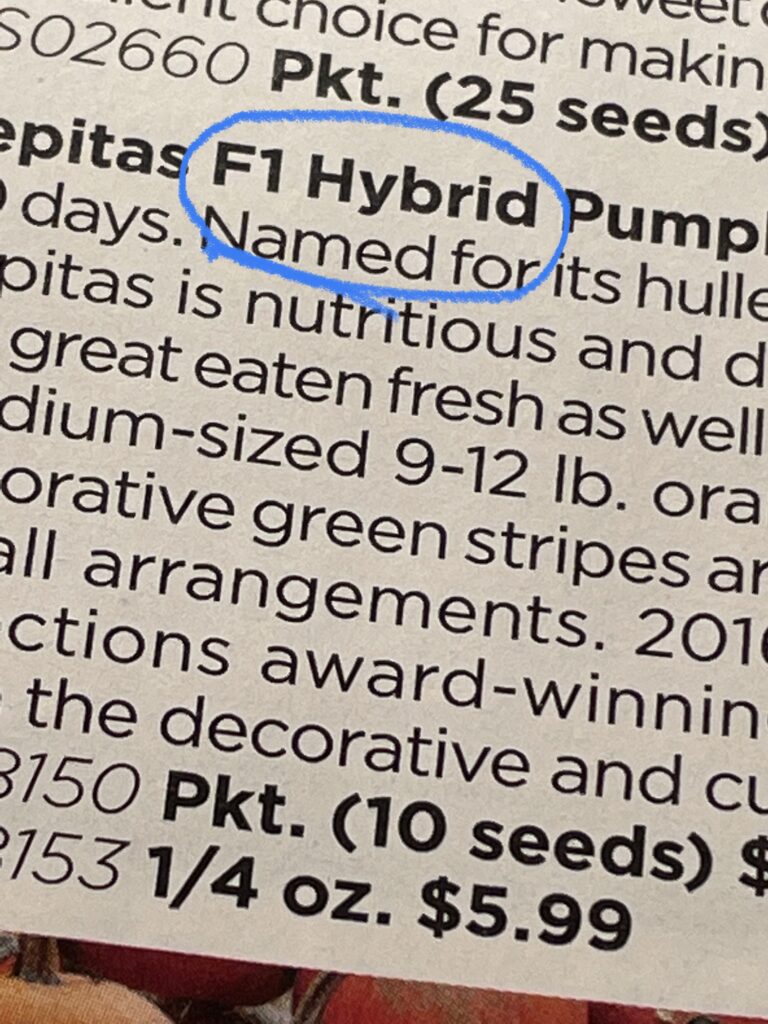
Seed pack size- This is also useful information, especially if you don’t want to end up with 300 broccoli seeds in a packet, or if you were expecting more than 5 seeds in a pack.  Every seed packet comes labeled with a weight, and some actually list the minimum number of seeds in a packet.  If you use your search engine you can find an approximate number of seeds based on type and weight, and some seed companies specialize in seed packs with smaller quantities especially for gardeners with small gardens.  There is no sense in paying for a full packet of seeds when you might find more affordable options with quantities that fit your size better.  Of course, if you end up with more seeds than you will use, you can store them from one season to the next, and also have seeds for trading with friends if you wanted.

Last, but not least:

To maximize your purchases, be sure you understand the growing conditions of the plants you will be growing.  Perhaps two of the biggest considerations is that of sunlight and drainage.  Some plants require full sun in order to produce fruit and grow well.  If they don’t have full sun, you may be wasting your money by trying to grow something that is not well suited to your space.  The other consideration is drainage, especially for vegetables that grow directly in the soil such as carrots and potatoes.  They (and roots of other plants) don’t like to be surrounded by muddy conditions, good drainage is very important.  Soil that is not compacted is also important for proper formation and growth of those vegetables that grow in the soil.

Making a list of what you want to grow, before you open the catalog, is very helpful.  This will help keep you centered and –maybe- help you avoid too many impulse splurges that you don’t have room for…..  But in all honesty, if your space or budget is limited, make a list of the things that are most important to you.  In my early garden days when I had limited space and very limited funds, I’d try to stick with growing the vegetables that would cost us the most to buy, that I had room to grow in my garden.  While we’re talking about limited space, don’t forget about growing vertical (trellising, grow bags hanging from fences, etc.), container gardening (squeeze plants in places you otherwise wouldn’t, without breaking ground), and intercropping (planting more than one crop in the same space – but soil health is really important to make this work as is understanding the nutritional needs of your plants and what should be planted next to each other – great time of year right now to research all of this stuff).

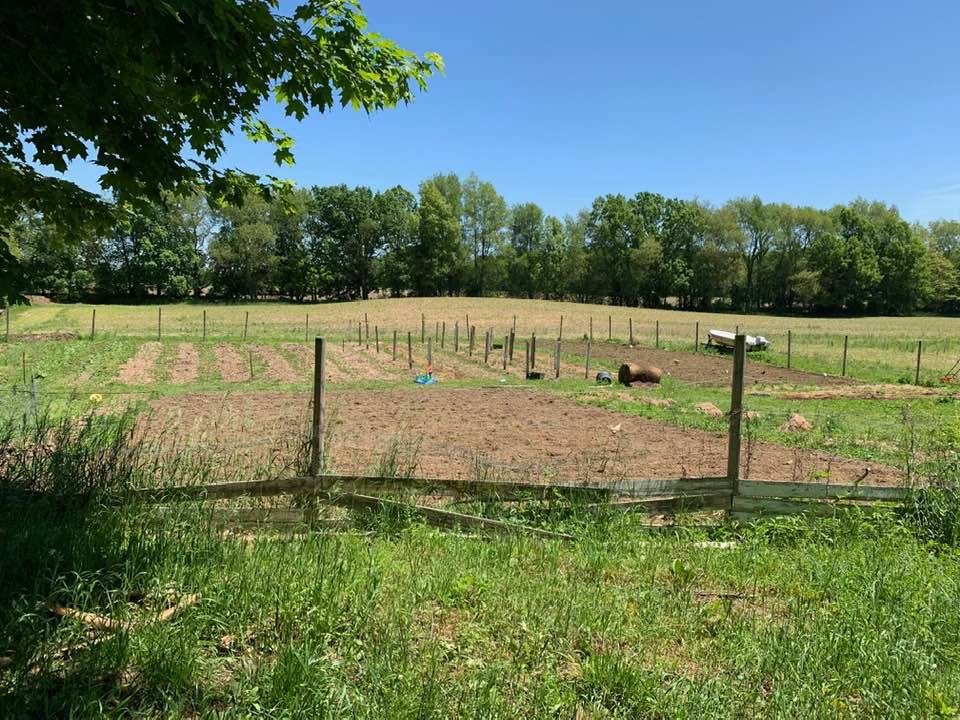
As you make your list, simultaneously make a garden map to make sure you have the space to grow the things you want.  Space is a very common concern for backyard gardeners because it’s not often unlimited, so growing has to be planned well in order to achieve the most harvest.

As you search catalogs, you may wish to find varieties that will compliment each other with intercropping and not overcrowd – perhaps a variety that will mature quickly and shade the ground of a slower-growing variety that will benefit from the weed suppression, the quicker maturing variety will be harvested and removed before the slower maturing variety, so there will be no competition for space or nutrients.  Or, consider succession planting, and when one succession is complete, something else can be planted in its place with enough days to maturity to mature before your last frost. Another consideration would be plants developed especially for container gardening, if you plan to grow in containers.  Some varieties of vegetables can be harvested at a ‘baby’ stage and also allowed to mature into a full grown vegetable or leafy green plant, which maximizes your harvest possibilities.

Once your seeds arrive:

I like to check my seeds with my order, then inventory them so I know what variety I purchased, packet weight or how many seeds, how many packets total, and any other notes I think are important.

Occasionally you may find that you have an empty seed packet, or part of your order is missing. Seed companies are happy to fix this right away, so the sooner you let them know, the sooner you will have your whole order.  It’s no fun to pack your order away only to notice you’re missing something or you have an empty packet of seeds when you’re ready to start them.

Be sure to store your seeds carefully where they will be cool, dark, and dry.

Also, very important:  Just about every seed company that I have ever visited online has a resource section with helpful planting information, charts and even video to help you become a better gardener!  Be sure to check them out.

Seed Starting Essentials

When it comes to starting seeds ahead of season indoors, there are a few things you will need.  My main goal in gardening is to grow good food for less than what I’d spend in a store, and it’s really not that hard.  But, with that in mind, I generally don’t get into needing multiple tools for the job – my seed starting essentials are pretty basic.  I will share with you what I use because I have a very limited budget, if you use something different that works for you, I would love to hear about it in the comments.

Essentials I use every year:

  • Seeds
  • Seed Starting Mix
  • Containers for Starting Seeds
  • Light
  • Heat Source
  • Water Source
  • A Safe Place to Grow

Seeds: 

This is pretty obvious, but if you are going to start seeds, you need seeds to start with.  You can order them online, from a catalog, or stop in to your local grocery store or greenhouse for seeds. I suggest buying seeds early in the season and storing them until you need them, because your favorite picks might be sold out by seed starting time.  If you are confused by terms like organic, heirloom or open pollinated, I have a post that might help you.

Seed Starting Mix:

When it comes to starting seeds, I prefer a potting mix that has fertilizer to feed for a few months time.  You can buy the special seed starting mix if you wish, but I find that it is more expensive.  A seed starting mix is often much lighter, making it easier for delicate seedlings to sprout.  Potting mix can contain heavier bits like compost or bits of wood which has been said to impede germination, but to be honest I don’t think I’ve ever had an issue with germination because of this.

Containers for Starting Seeds:

This is where you can get creative and frugal.  You can spend money on a seed tray, cell inserts or plug trays, or you can use what you probably already have on hand: old plastic food containers, yogurt cups, k-cups, egg cartons, toilet paper rolls, you can even make your own using newspaper.  Any container that is large or small enough (large enough to properly grow a seedling without being too large which will cost you more in potting soil, but you can’t have the soil level too far down in the container or you won’t be able to get sufficient light to your seedling and it will grow weak and leggy.  Be sure to fill your containers!) and has a way to drain excess water.  Ask friends to hold on to their seedling containers that they often throw out after transplanting and you can reuse these year after year.  I’m not saying an investment in seed starting equipment is bad, but I am saying it is not necessary.  If you plan to do a lot of seed starting, it is probably worth your while to invest in seed trays, inserts or plug trays of various sorts.  They can all be washed and re-used for many years with proper care.

Light Source:

My light sources are fluorescent “shop lights” that are hung on a chain so they are adjustable.  I position two, 4ft lights across my 4ft shelves in the basement greenhouse.  Each has two lights, most are fitted with one ‘warm’ and one ‘cool’ bulb.  You can use grow lights if you have them, for sure.  Lighting is often a worry for new beginners and I want to make it clear that grow lights are not necessary to start seeds, so you can take a deep breath of relief knowing that expense isn’t necessary.   You can try to find them used, but if nothing else I buy them new for between $15-19 per fixture.

During our seed starting period here in Michigan, sunlight alone is not sufficient to grow strong seedlings this time of year.  You may find your seedlings grow tall and weak, lighter in color and eventually fall over.  Some seedlings can be repotted (such as tomatoes), but this is a death sentence for many others. Another consideration is that right next to a window is often cold and drafty, which can stunt and slow the proper growth of your seedlings, also.

Heat Source:

Heat is important for seed germination.  Some seeds prefer to germinate in soil that is quite warm (such as peppers and tomatoes), while other seeds prefer cooler soil temperatures, like onions.  Each vegetable has a specific range in which soil temperature it germinates best in.  While many seeds are fine being started in a room-temperature room, some may need a little help if your room doesn’t warm the soil sufficiently.  You can set the seed containers near a wood stove or near a heat source, or invest in a germination mat that should be turned on and left on until seeds germinate.  You might even be able to build a simple germination chamber which keeps the air warm and humid in a box making it the perfect environment for germination.

Water Source:

This could be as simple as a cheap spray bottle from the dollar store.  When seedlings emerge, some are very delicate. Using the spray nozzle on your kitchen sink may be too powerful for delicate seedlings and if you try watering them with too heavy of a stream they will become damaged and die.  Once they get a bit bigger using the sink spray nozzle should be fine, but for the early days or weeks, a spray bottle is great.  I have a lot of seedlings to water, so I invested in a 1.5 gallon sprayer that I just fill with water each day and I can adjust the spray from a mist to a stream.  You can purchase a larger sprayer, also.  When watering seedlings, you want to water them thoroughly so the water reaches the roots, but don’t saturate them.  It’s ok if the top layer of potting mix dries between watering.

A Safe Place to Grow:

I can’t tell you how many times my poor seedlings have been mauled by my children, dogs or cats.  I’ve had cats poop in my tomato trays, dogs knock whole trays over, children pulling seedlings out and playing in the dirt.  One year I had a dog overturn a piece of wood that held four trays of squash seedlings on a makeshift table.   I work so hard to grow our food that these setbacks are heartbreaking.  Please consider the threats that your seedlings will be under and plan around them so you don’t experience the same fate.  I eventually kept all of my seedlings in one of those four shelved “mini greenhouses” with the cover.  That worked well for a little while, but it trapped too much heat and moisture so I needed to undo the front cover and left my seedlings vulnerable again.  Another option that worked for me was wire dog cages.  I collected a bunch of them from various sources and create long crates wide enough to hold my trays and long enough to fit on a desk or table.  I zip-tie this together and also include cage pieces on the top to keep all animals out.   The wire cages were perfect for mounting the shop lights in, also.  Now I have an actual greenhouse in my basement, and I use the mini greenhouses as my shelving.  I zip the door down each night and nothing bothers them.  It has mesh windows on the side that I can open if it ever gets too warm, but that has never been necessary because the basement seems to stay a consistent temperature and  I control the heat inside the greenhouse using a radiant heater.  I also keep a small oscillating fan in here and turn it on frequently to simulate a gentle breeze, which helps seedlings grow strong.

That’s it!  Do you have a favorite tool or supply not listed here that you use for starting seeds?  Let me know in the comments!

How long do seeds last?

Seeds are not usually confined to their use during the planting year.  Most last at least two years, sometimes as long as 10 years or more.  Proper storage will help extend their lives.  It is helpful to know both how to store them and how long they keep for, and perhaps you can several years use or more, out of a single seed packet.

Best practices for seed storage:

  • Somewhere Dark
  • Cool (Ideally, 40F)
  • Dry
  • Airtight container (jars or ziplock baggies)

Before counting on your seeds when they are past their prime, you can do a germination test to determine viability.  Pick out about 10 seeds from your packet and place them in moist layers of paper towel, place them in an unsealed plastic bag and set the bag in a warm, sunny location.  Check the moisture of the paper towels daily, and also check for germination.  Once you notice a root poking through the seed coat, the seed has germinated.   Wait a week, then count to see how many seeds have germinated to determine if you should order new seeds or proceed with these.  If you plan to do your germination test right before you need to start seeds for the season, you can use the sprouted seeds from the paper towel and place them in your seed starting medium and allow them to continue growing.  Generally, a germination rate of 80-90% is acceptable, anything less than 50% and you will probably want to buy fresh seeds.  If some seeds did not germinate but you’d still like to use them, you may wish to plant the seeds more thicker than usual (if broadcasting over your garden bed), or include an extra couple of seeds in each cell if starting seeds indoors to make up for what may not sprout.

Lifespan of seeds:  The lifespan of seeds can vary, depending on your storage conditions, so the chart below is simply a guideline.  Always do a germination test if you are unsure.  Keeping your seeds in their best environment at all times will help ensure a longer lifespan, as each time they are removed from ideal storage conditions, they will experience a decline in viability.  The more exposure to adverse conditions they experience, the sooner they will fail to germinate all together. The exposure to adverse conditions can also contribute to a lack of vigor, or the ability of a plant to grow well.   Seedlings that don’t have great vigor will often grow slowly, look stunted, succumb to diseases easier, or be deformed.   So even though your seeds may have germinated, the next challenge is getting them to grow strong, uniform, and healthy – but if they are too old, with even the best care they may not thrive.


Vegetables Lifespan
Asparagus 3 years
Beans 3 years
Beets 3 years
Broccoli 3 years
Brussels sprouts 4 years
Cabbage 4 years
Carrots 3 years
Cauliflower 4 years
Celery 3 years
Chard 3 years
Chicory 4 years
Collards 4 years
Corn (sweet) 2 years
Cress 5 years
Cucumbers 5 years
Eggplant 4 years
Endive 5 years
Kale 4 years
Kohlrabi 3 years
Leeks 2 years
Lettuce 3 years
Muskmelons 5 years
Okra 2 years
Onions 1 year
Oriental greens 3 years
Parsnips 1 year
Peas 3 years
Peppers 2 years
Radishes 5 years
Rutabagas 4 years
Spinach 3 years
Squash (Summer & Winter) 4 years
Tomatoes 5 years
Turnips 4 years
Watermelon 4 years


What are plant families?

“Plant Families” are mentioned quite a bit in the gardening world. It refers to a group of vegetables that share many of the same care, growth, pest/disease and nutrient need characteristics. If you know how to care for broccoli, you stand a pretty good chance at growing the rest of the brassica family too – such as cauliflower, cabbage, kohlrabi and brussels sprouts. Please allow me to introduce you to the common families you will host in your gardens!

Who belongs in what family?

Brassicaceae

Also called crucifers, brassicas, or cole crops. This family includes cabbages, radishes, mustard greens, turnips, rutabega, arugula, broccoli, kale, brussels sprouts, kohlrabi.

These plants are started indoors and placed outside in March/April for a spring harvest, or started in June for a mid-July planting (for a fall harvest). They are a cool weather crop and don’t tolerate heat. For fall harvests, allowing these plants to withstand a light frost can enhance the sweetness of their flavor.

Brassicas don’t tolerate acidic soil, prefer lots of organic matter, and are shallow rooted.

Solanaceae

Also called nightshades. This family includes tomatoes, tomatilloes, eggplants, peppers, and white & red potatoes.

These plants are warm weather plants and should be started indoors and transplanted out after danger of frost has passed, with the exception of potatoes because they are planted underground early in the season.

Nightshades prefer lots of organic matter in their soil, and prefer the soil be kept damp. They can tolerate warm weather as long as they are kept watered, and they do best watered at ground level vs. from the top (as with a sprinkler). All of these plants have medium to deep roots.

Potatoes are kind of an odd plant in this family when you consider that we eat the tuber of that plant vs. the fruit of the rest, and the potato can be planted in the ground much earlier than the others. So why is it included in this family? All of the plants produce a compound called solanine.

Interesting to note, sweet potatoes are not a part of this family.

Fabaceae

Also called legumes. This family includes peas, beans, peanuts.

Some fun information about this family: Beans are available as bush beans (they stay small and require no trellis or support), or pole/runner beans, which spread by vine and love to climb trellises. Green beans are eaten whole, in the pod, which contain immature seeds. Some green beans that are eaten fresh will have a tough strong that needs to be removed prior to consuming or canning, thus known as “string beans.” You can find “green beans” in colors such as green, yellow (wax) and even purple. some varieties are preferred because they are ‘stringless.’ Beans left to dry in the pod are commonly called soup beans. These are mature seeds that are removed from the pod already dry, and ready to be soaked and cooked. This includes beans such as kidney beans, black beans, pinto, canellini, and much more. Beans are direct sown in the soil after all danger of frost has passed.

Common peas grown are snow/snap peas and garden/shell peas. The snow or snap peas are eaten in the pod, before the peas mature. Garden or shell peas are grown until the peas are noticeable (but not too big or they taste horrible) and then the pod is removed from the peas. Peas can tolerate cool weather and are often planted out early – about six weeks before the last frost.

Legumes fix nitrogen in the soil, converting atmospheric nitrogen into a form that can be used by plants. This is helpful for returning nitrogen to the soil after a heavy nitrogen feeder was previously planted in the same spot, such as corn. They both prefer less organic matter in the soil, don’t require much nitrogen, and have medium-depth roots. Fun fact: Transplants reduces the nitrogen fixing ability, so direct sow whenever possible. Luckily these grow great as direct sown seeds.

Cucurbitaceae

Also called cucurbits or the gourd family. This family includes cucumbers, watermelon and melons, pumpkins and other winter squash as well as zucchini and summer squash.

These plants are all warm weather plants that can be started indoors a few weeks before the last frost then transplanted after the danger of frost has passed, or they can be direct sown right in the soil once the soil warms. These all prefer warm soil, so planting as soon as that last frost date has passed is not recommended – I typically direct sow in June once the soil has had some warm temperatures to heat it up. Of course, a tarp can also help hurry the soil warmth, also.

Cucurbits are vining plants, so they will require a lot of room in your garden unless you can trellis the vines. Pumpkins and winter squashes will take all season to grow, while zucchini and summer squash are ready sooner. They prefer a lot of organic matter in their soil, and they have medium to deep roots. One common downfall of most of these family members is they are susceptible to mildews and blights, as well as squash bugs.

Apiaceae

Also known as the carrot family. This includes carrots, parsley, coriander, fennel, parsnip and celery.

These plants are cool season crops and prefer regular watering. They grow best in sandy or loamy soil without too much organic matter. The soil must drain well.

One important fact about these plants is that they are very slow to germinate. Carrots should always be direct sown, which makes getting them to germinate before the weeds take over quite difficult! You can tarp their beds until they sprout, just be sure they have enough water. Their root depths are all over the place, carrots being a medium depth, celery and parsley being shallow, and parsnip is deep.

Other Families:

Alliaceae

Also known as the onion family. This includes onions, garlic, leek, scallion and chive.

This family prefers cool weather if you are harvesting leaves, but bulb formation requires hot, dry weather. They have very shallow roots and grow best in loamy soils, free of weeds and watered well.

Poaceae

Also known as grasses/grains. This includes corn, along with wheat and sugar cane. This family is a heavy nitrogen feeder and requires lots of organic matter or fertilizer. You need to plant in blocks vs. long rows to help ensure pollination.

Chenopodiaceae

Also known as the goosefoot family. This includes beets, chard and spinach. This is a cool weather family often planted out before the last frost. They have medium to deep roots which help break up the soil and also recycle nutrients well. They grow best in soil that drains well and has a high amount of well rotted compost or organic matter.

Lamiaceae

Also known as the mint family. This includes mints, basils, rosemary, thyme, oregano and sage.

Some of these members, such as oregano and sage are perennials, so be sure you are happy with the placement in your garden. These are pretty drought tolerant and handle poor soils well.

Asteraceae

Also known as the sunflower or aster family. This includes lettuce, artichokes, and sunflowers.

This family is fast growing, shallow-rooted plants that grow best in loamy soils. They prefer lots of organic matter and often have very few pests.

Organic vs. Hybrid vs. Heirloom…. What’s the difference?

If you have ever gotten confused over all the different names given to different varieties of plants, you are not alone! This is perhaps one of the more complicated aspects of gardening because there are just so many options, so many names, how do you know what to pick?

While picking a favorite variety will take some trial and error in the form of planting and deciding whether you like it or not (or, ask to try your friends produce and ask him or her what variety they planted), being able to choose seeds that are organic, hybrid, open pollinated or heirloom doesn’t have to be that confusing. I will go over each one so you become familiar with the terms.

As a side note, many people are fearful of buying GMO seeds. While GMO seeds are available to farmers, they are not available to the home gardener. If you are purchasing seeds from a home garden seed catalog or purchasing them at a store, you don’t need to worry about accidentally buying GMO (genetically modified) seeds. To buy GMO seed, a farmer often has to sign a contract, so you wouldn’t make any mistake as to what you are buying. So in reality, that “Non-GMO” label doesn’t really mean much, other than to reassure customers.

Hybrid: A hybrid seed will produce a crossbred plant. It is a purposeful cross between two different parent plants. Hybrids can be bred for specific qualities, such as disease resistance, being slow to bolt in hot weather, tolerating drought, maturing early, etc. They also produce pretty constant results. The main downfall to a hybrid seed is that if you plan to save seed for the following year, hybrid seeds will not produce the exact same plant they came from when you plant those seeds the following year. When looking at seed packets, somewhere on the pack you will see either ‘F1’ or the word hybrid in the name or description. It has been said that hybrid plants often lack flavor in exchange for beneficial traits, but that is up to each individual gardener to decide.

Open Pollinated: A seed that is open pollinated means the flowers are either self-fertilized, or fertilized by pollinators or wind. Sometimes by hand, if trying to keep the seed pure for saving. The seed comes from two parents of the same variety so the seed is considered ‘purebred’ and for the purpose of seed saving, if isolation methods are necessary and used, this or heirloom seed is what you want to grow. Often, a seed packet does not specify ‘open pollinated’ on it (it will specify if hybrid), but if you are unsure you can always ask your internet search engine and find out whether the variety you are curious about is open pollinated or hybrid. Sometimes, open pollinated seed is a little more susceptible to pests or disease, or a little more temperamental to deal with. It is interesting to note, that through careful seed saving practices, you can work on correcting these things over time, as the seed learns to adjust and become more tolerant in your own soil. Of course, having fertile soil to begin with, proper spacing, and good management practices go a long way in producing a successful garden no matter the seed!

Organic: Organic seeds can be open pollinated, heirloom, or hybrid seeds. The name means that the plant they came from was grown with organic standards. You can continue to grow them organically once you plant them, or grow them with conventional methods. Organic seeds are always marked organic.

Heirloom: Heirloom seeds are open pollinated, breed true, and passed down from generation to generation. The plants grown from these seeds can be traced back in human history for long periods. These seeds can be organic (if the parent plant was grown with organic standards, and you continue), or conventional. A heirloom variety is often 50-100+ years old. Heirloom seeds are almost always marked as ‘heirloom’ and they are safe to save seed from.

Picking the perfect garden spot

Some of you are hoping to grow your very first garden next year. I am so excited for your adventure! A successful garden starts with a great spot – and finding that spot, and even preparing it now, during the fall, will increase your chances for a fantastic garden. To learn how I prepare my garden beds, feel free to read my post on mulching and my post on whether you need a tiller or not. Both of these have great suggestions for readying your garden.

But your garden location is really, really important. Picking this spot ahead of time can have many benefits. This is especially true if you are growing a garden in a smaller backyard that has a lot of surrounding trees

Pay attention to the potential garden spot through all the seasons, if possible. If you have just moved to a new home, I would suggest planning a garden the following year if possible, so you can watch how your yard behaves through heavy rains (does it drain well? puddle? Run off? Is there erosion?), normal weather, wind flow on windy days, and sun/shade through the seasons.

A large percentage of us decide to grow a garden in the spring. All winter long we think we have the perfect full sun spot picked out and can’t wait to get our seeds in the ground. Then summer comes, and the garden is covered in shade. The leaves grew in on the trees that were bare all winter and spring, and your perfect garden spot is no longer perfect after all. Remember this as you pick your spot!

Pay attention to what grows in your potential new garden spot. Weeds will tell you a lot about the soil. Learn to identify them and what soil preferences they have. Dig in the soil and see what the structure of the soil is like – is it compacted? Very dry? Soggy? Are there earthworms? Is the soil sandy, clay? Are there many rocks? Roots? Rocks and roots will make gardening difficult – not impossible, though difficult. We discovered a rather large concrete pad under a few inches of soil in my preferred garden spot in one of our backyards. We ended up renting a jackhammer to remove it. I know others who have discovered hardware cloth or chicken wire buried below the soil, or trash. A lot can be covered with soil and grass will often grow just fine over it. We want to give our vegetables the opportunity to set roots really deep though to access water and minerals below the surface of the soil. Knowing ahead of time that you may need to spend some time cleaning up your potential gardening spot is helpful so you can get that out of the way before you are prepared to put plants in the ground.

The ideal garden will:

  • Have a minimum of 6-8 hours of direct sunlight, depending on what you want to grow. Most greens, such as lettuce and spinach, can tolerate a mere 4 hours of sunlight, but most gardeners want to grow more than that. Root vegetables, such as potatoes, require 5-6 hours of sunlight, and then fruiting plants, such as tomatoes, will require 8+
  • Be southern facing
  • Away from direct contact with trees, as the roots of a tree will make maintaining a garden difficult and they will compete for water and nutrients with your vegetables (not to mention, shade!).
  • Have a sandy loam, though growing in clay is often successful. You can always make the soil you have better over time by adding organic matter, but if you have the choice, often a sandy loam is preferable. A ‘loam’ has approximately 40% sand and silt, and 20% clay. A ‘sandy loam’ will have more sand percentage at the expense of clay and silt. Of course, a mainly sandy garden or mainly clay garden will have issues of its own, but a good balance is ideal. If you have ‘stuff’ growing there already (grass, weeds), then you can make it work! Beware the soil that remains bare all. the. time!
  • Not be on a slope – increased chance of erosion
  • Have a soil ph of 6.5-7.0, though this may vary depending on what you are trying to grow.
  • Have a water source nearby – if no running water, consider catching rainwater and pumping it out through a hose.
  • Be close enough for convenience – you will need to maintain the garden and bring the harvest back to your home so is your garden a realistic distance from your home? Will your hose reach your garden location?
  • Be big enough – what do you want to grow? You can grow a large quantity of food in small spaces, thanks to methods such as square foot gardening, interplanting, succession planting and vertical gardening. But it is helpful to know how much room you need based on what you want to grow – you don’t want to plant pumpkins and then become shocked when they take over half of your backyard and shade out the rest of your garden! I will be happy to help you with garden planning if you have questions.

You may find it helpful to get a soil test done on your soil, which will give you an idea of soil pH and any areas the soil is lacking in providing nutrients needed for plant growth. If your soil is in need of fertilizer, the biology in your soil is lacking. Often times, adding compost will help the soil food web come back to life and find its balance, so the nutrients your plant needs are released as soon as they need them. This can only happen when you have the right kind of bacteria and fungi present (they are found in compost!), to be eaten by protozoa, nematodes (beneficial ones, anyway), and invertebrates, which will release nutrients in a plant available form. Compost is a magical substance that you can create right in your own backyard and eliminate your need for purchased composts and fertilizers.

What is a Hardiness Zone?

Gardeners refer to their hardiness zone quite a bit…. What is that?

Our country is divided into certain growing zones, because certain things grow better in some areas than others. As well, something that grows as a perennial in some zones, may have to be treated as a annual in others. These hardiness zones are based on the average low temperatures during the winter. Something that grows well in Florida may not grow well up here in Michigan due to differences in climate, In the US we start at zone 1, and go up to zone 13. If you were looking in a seed catalog to find a plant that would grow well in your area, knowing your zone will help you pick out the plants that are best suited for you.

When looking at seed packets and considering your hardiness zone, sometimes the zones the plant grows well in will be a range, say, zones 3-7. It’s important to make note that if you are trying to grow something in a zone higher than 7, it will not grow well because it needs the dormancy period that winter time provides in those zones.

To find your zone, visit this link and place your zipcode in the box that asks for it. You will notice Michigan is home to several different zones – knowing your unique zone will be very helpful in your gardening success!