When it comes to starting seeds ahead of season indoors, there are a few things you will need. My main goal in gardening is to grow good food for less than what I’d spend in a store, and it’s really not that hard. But, with that in mind, I generally don’t get into needing multiple tools for the job – my seed starting essentials are pretty basic. I will share with you what I use because I have a very limited budget, if you use something different that works for you, I would love to hear about it in the comments.
Essentials I use every year:
- Seeds
- Seed Starting Mix
- Containers for Starting Seeds
- Light
- Heat Source
- Water Source
- A Safe Place to Grow
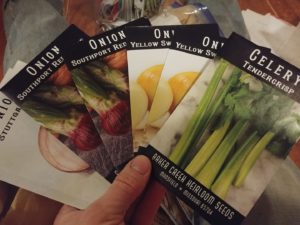
Seeds:
This is pretty obvious, but if you are going to start seeds, you need seeds to start with. You can order them online, from a catalog, or stop in to your local grocery store or greenhouse for seeds. I suggest buying seeds early in the season and storing them until you need them, because your favorite picks might be sold out by seed starting time. If you are confused by terms like organic, heirloom or open pollinated, I have a post that might help you.
Seed Starting Mix:
When it comes to starting seeds, I prefer a potting mix that has fertilizer to feed for a few months time. You can buy the special seed starting mix if you wish, but I find that it is more expensive. A seed starting mix is often much lighter, making it easier for delicate seedlings to sprout. Potting mix can contain heavier bits like compost or bits of wood which has been said to impede germination, but to be honest I don’t think I’ve ever had an issue with germination because of this.
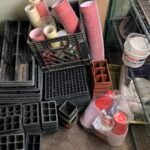
Containers for Starting Seeds:
This is where you can get creative and frugal. You can spend money on a seed tray, cell inserts or plug trays, or you can use what you probably already have on hand: old plastic food containers, yogurt cups, k-cups, egg cartons, toilet paper rolls, you can even make your own using newspaper. Any container that is large or small enough (large enough to properly grow a seedling without being too large which will cost you more in potting soil, but you can’t have the soil level too far down in the container or you won’t be able to get sufficient light to your seedling and it will grow weak and leggy. Be sure to fill your containers!) and has a way to drain excess water. Ask friends to hold on to their seedling containers that they often throw out after transplanting and you can reuse these year after year. I’m not saying an investment in seed starting equipment is bad, but I am saying it is not necessary. If you plan to do a lot of seed starting, it is probably worth your while to invest in seed trays, inserts or plug trays of various sorts. They can all be washed and re-used for many years with proper care.
Light Source:
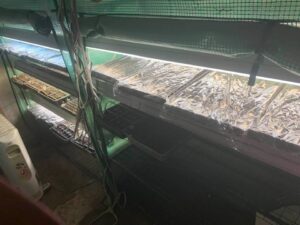
My light sources are fluorescent “shop lights” that are hung on a chain so they are adjustable. I position two, 4ft lights across my 4ft shelves in the basement greenhouse. Each has two lights, most are fitted with one ‘warm’ and one ‘cool’ bulb. You can use grow lights if you have them, for sure. Lighting is often a worry for new beginners and I want to make it clear that grow lights are not necessary to start seeds, so you can take a deep breath of relief knowing that expense isn’t necessary. You can try to find them used, but if nothing else I buy them new for between $15-19 per fixture.
During our seed starting period here in Michigan, sunlight alone is not sufficient to grow strong seedlings this time of year. You may find your seedlings grow tall and weak, lighter in color and eventually fall over. Some seedlings can be repotted (such as tomatoes), but this is a death sentence for many others. Another consideration is that right next to a window is often cold and drafty, which can stunt and slow the proper growth of your seedlings, also.
Heat Source:
Heat is important for seed germination. Some seeds prefer to germinate in soil that is quite warm (such as peppers and tomatoes), while other seeds prefer cooler soil temperatures, like onions. Each vegetable has a specific range in which soil temperature it germinates best in. While many seeds are fine being started in a room-temperature room, some may need a little help if your room doesn’t warm the soil sufficiently. You can set the seed containers near a wood stove or near a heat source, or invest in a germination mat that should be turned on and left on until seeds germinate. You might even be able to build a simple germination chamber which keeps the air warm and humid in a box making it the perfect environment for germination.
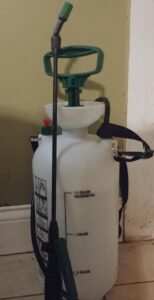
Water Source:
This could be as simple as a cheap spray bottle from the dollar store. When seedlings emerge, some are very delicate. Using the spray nozzle on your kitchen sink may be too powerful for delicate seedlings and if you try watering them with too heavy of a stream they will become damaged and die. Once they get a bit bigger using the sink spray nozzle should be fine, but for the early days or weeks, a spray bottle is great. I have a lot of seedlings to water, so I invested in a 1.5 gallon sprayer that I just fill with water each day and I can adjust the spray from a mist to a stream. You can purchase a larger sprayer, also. When watering seedlings, you want to water them thoroughly so the water reaches the roots, but don’t saturate them. It’s ok if the top layer of potting mix dries between watering.
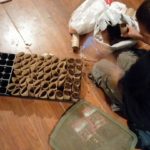
A Safe Place to Grow:
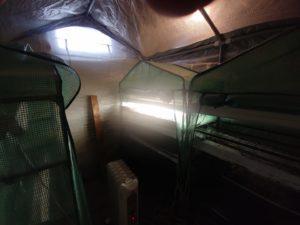
I can’t tell you how many times my poor seedlings have been mauled by my children, dogs or cats. I’ve had cats poop in my tomato trays, dogs knock whole trays over, children pulling seedlings out and playing in the dirt. One year I had a dog overturn a piece of wood that held four trays of squash seedlings on a makeshift table. I work so hard to grow our food that these setbacks are heartbreaking. Please consider the threats that your seedlings will be under and plan around them so you don’t experience the same fate. I eventually kept all of my seedlings in one of those four shelved “mini greenhouses” with the cover. That worked well for a little while, but it trapped too much heat and moisture so I needed to undo the front cover and left my seedlings vulnerable again. Another option that worked for me was wire dog cages. I collected a bunch of them from various sources and create long crates wide enough to hold my trays and long enough to fit on a desk or table. I zip-tie this together and also include cage pieces on the top to keep all animals out. The wire cages were perfect for mounting the shop lights in, also. Now I have an actual greenhouse in my basement, and I use the mini greenhouses as my shelving. I zip the door down each night and nothing bothers them. It has mesh windows on the side that I can open if it ever gets too warm, but that has never been necessary because the basement seems to stay a consistent temperature and I control the heat inside the greenhouse using a radiant heater. I also keep a small oscillating fan in here and turn it on frequently to simulate a gentle breeze, which helps seedlings grow strong.
That’s it! Do you have a favorite tool or supply not listed here that you use for starting seeds? Let me know in the comments!