Picking the perfect garden spot

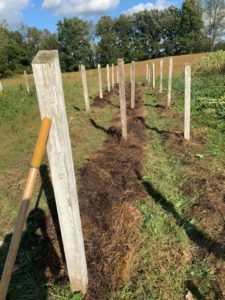
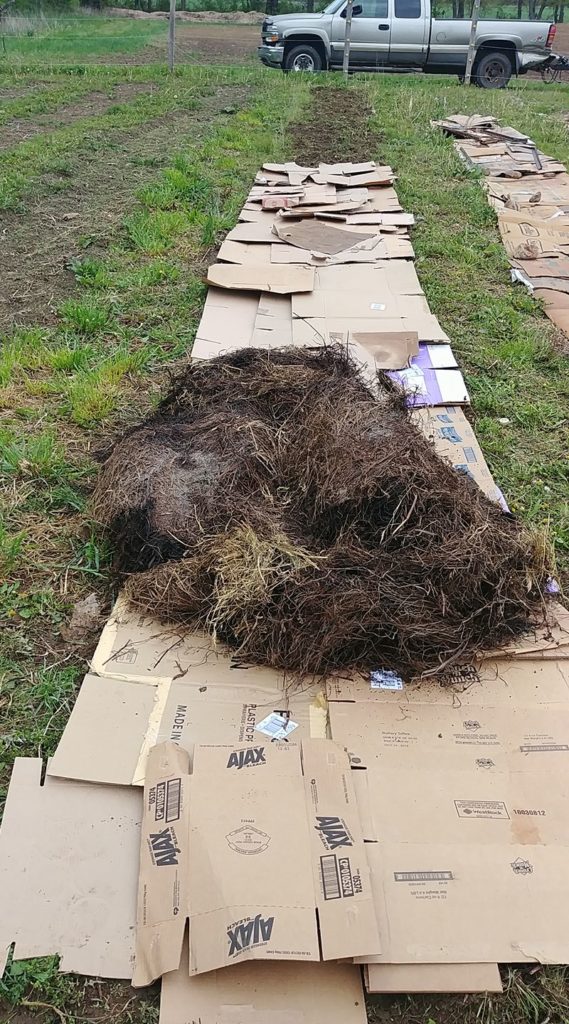
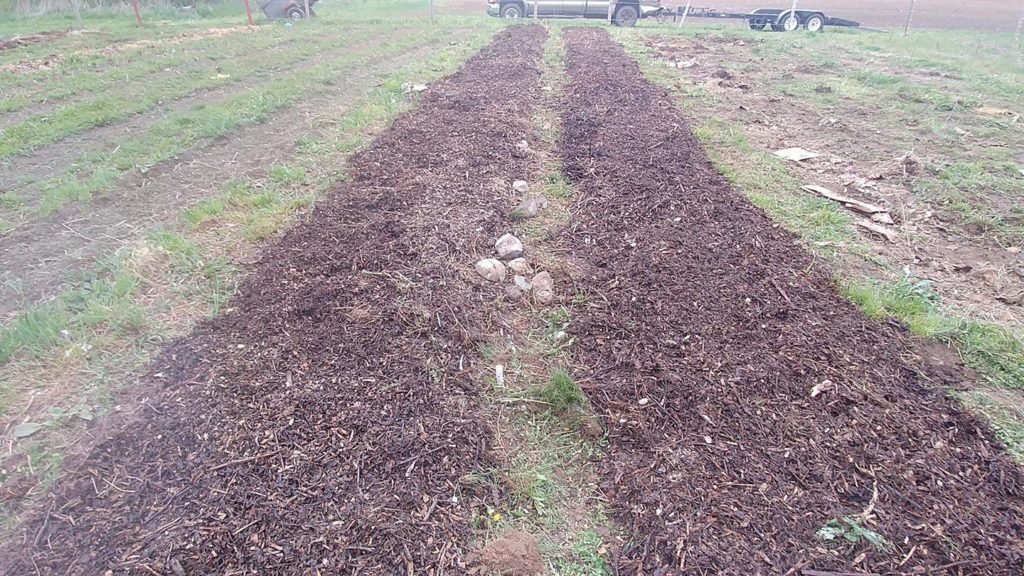
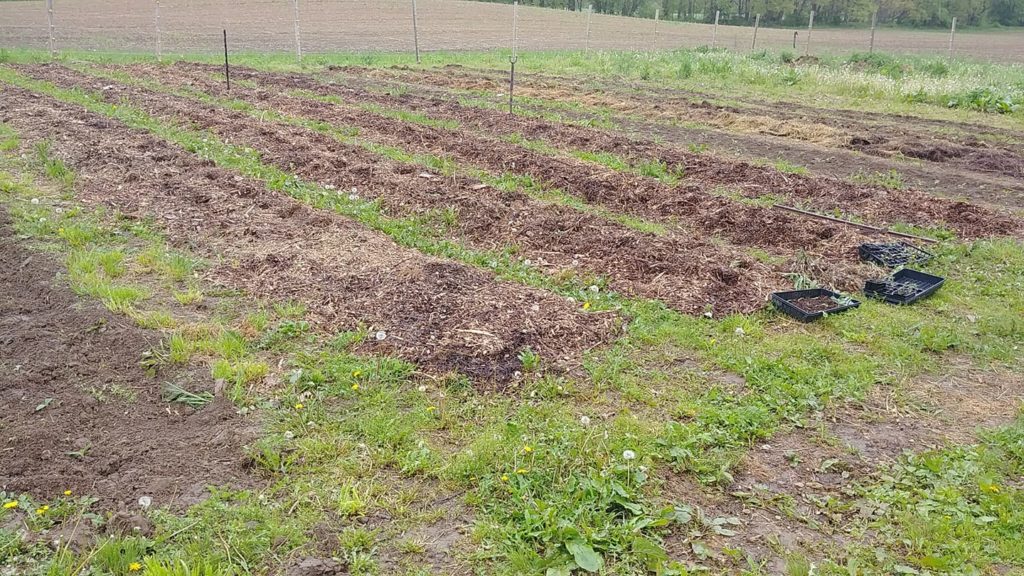
Some of you are hoping to grow your very first garden next year. I am so excited for your adventure! A successful garden starts with a great spot – and finding that spot, and even preparing it now, during the fall, will increase your chances for a fantastic garden. To learn how I prepare my garden beds, feel free to read my post on mulching and my post on whether you need a tiller or not. Both of these have great suggestions for readying your garden.

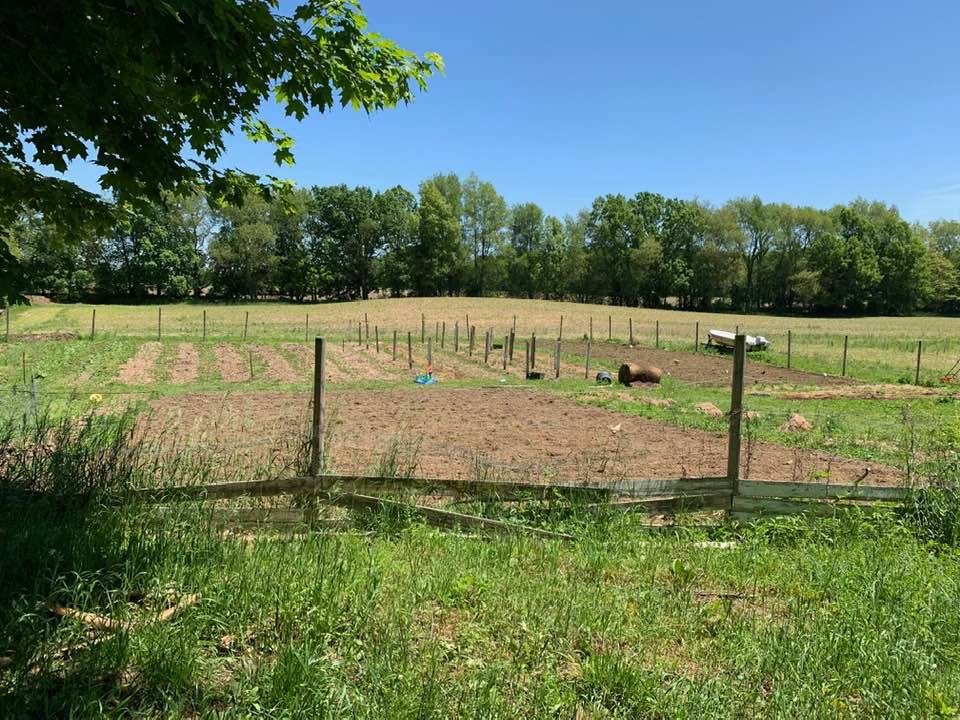
But your garden location is really, really important. Picking this spot ahead of time can have many benefits. This is especially true if you are growing a garden in a smaller backyard that has a lot of surrounding trees

Pay attention to the potential garden spot through all the seasons, if possible. If you have just moved to a new home, I would suggest planning a garden the following year if possible, so you can watch how your yard behaves through heavy rains (does it drain well? puddle? Run off? Is there erosion?), normal weather, wind flow on windy days, and sun/shade through the seasons.

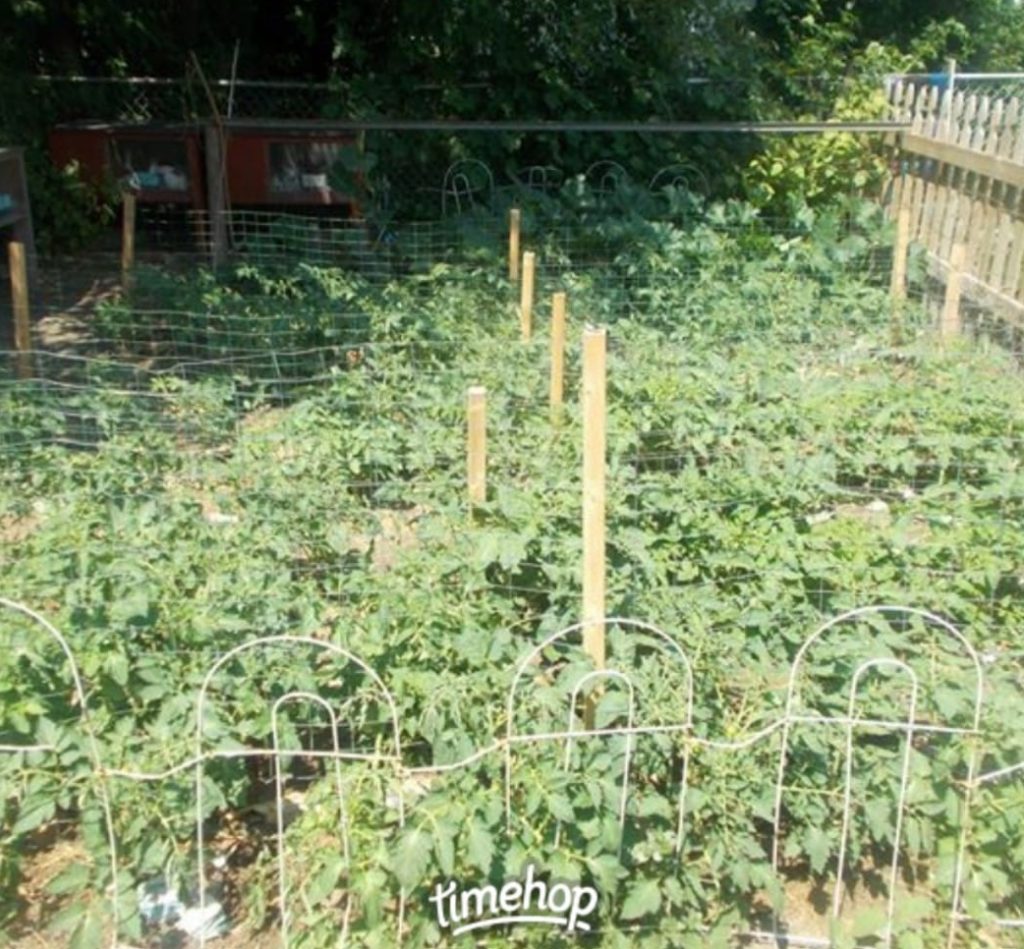
A large percentage of us decide to grow a garden in the spring. All winter long we think we have the perfect full sun spot picked out and can’t wait to get our seeds in the ground. Then summer comes, and the garden is covered in shade. The leaves grew in on the trees that were bare all winter and spring, and your perfect garden spot is no longer perfect after all. Remember this as you pick your spot!

Pay attention to what grows in your potential new garden spot. Weeds will tell you a lot about the soil. Learn to identify them and what soil preferences they have. Dig in the soil and see what the structure of the soil is like – is it compacted? Very dry? Soggy? Are there earthworms? Is the soil sandy, clay? Are there many rocks? Roots? Rocks and roots will make gardening difficult – not impossible, though difficult. We discovered a rather large concrete pad under a few inches of soil in my preferred garden spot in one of our backyards. We ended up renting a jackhammer to remove it. I know others who have discovered hardware cloth or chicken wire buried below the soil, or trash. A lot can be covered with soil and grass will often grow just fine over it. We want to give our vegetables the opportunity to set roots really deep though to access water and minerals below the surface of the soil. Knowing ahead of time that you may need to spend some time cleaning up your potential gardening spot is helpful so you can get that out of the way before you are prepared to put plants in the ground.

The ideal garden will:

  • Have a minimum of 6-8 hours of direct sunlight, depending on what you want to grow. Most greens, such as lettuce and spinach, can tolerate a mere 4 hours of sunlight, but most gardeners want to grow more than that. Root vegetables, such as potatoes, require 5-6 hours of sunlight, and then fruiting plants, such as tomatoes, will require 8+
  • Be southern facing
  • Away from direct contact with trees, as the roots of a tree will make maintaining a garden difficult and they will compete for water and nutrients with your vegetables (not to mention, shade!).
  • Have a sandy loam, though growing in clay is often successful. You can always make the soil you have better over time by adding organic matter, but if you have the choice, often a sandy loam is preferable. A ‘loam’ has approximately 40% sand and silt, and 20% clay. A ‘sandy loam’ will have more sand percentage at the expense of clay and silt. Of course, a mainly sandy garden or mainly clay garden will have issues of its own, but a good balance is ideal. If you have ‘stuff’ growing there already (grass, weeds), then you can make it work! Beware the soil that remains bare all. the. time!
  • Not be on a slope – increased chance of erosion
  • Have a soil ph of 6.5-7.0, though this may vary depending on what you are trying to grow.
  • Have a water source nearby – if no running water, consider catching rainwater and pumping it out through a hose.
  • Be close enough for convenience – you will need to maintain the garden and bring the harvest back to your home so is your garden a realistic distance from your home? Will your hose reach your garden location?
  • Be big enough – what do you want to grow? You can grow a large quantity of food in small spaces, thanks to methods such as square foot gardening, interplanting, succession planting and vertical gardening. But it is helpful to know how much room you need based on what you want to grow – you don’t want to plant pumpkins and then become shocked when they take over half of your backyard and shade out the rest of your garden! I will be happy to help you with garden planning if you have questions.

You may find it helpful to get a soil test done on your soil, which will give you an idea of soil pH and any areas the soil is lacking in providing nutrients needed for plant growth. If your soil is in need of fertilizer, the biology in your soil is lacking. Often times, adding compost will help the soil food web come back to life and find its balance, so the nutrients your plant needs are released as soon as they need them. This can only happen when you have the right kind of bacteria and fungi present (they are found in compost!), to be eaten by protozoa, nematodes (beneficial ones, anyway), and invertebrates, which will release nutrients in a plant available form. Compost is a magical substance that you can create right in your own backyard and eliminate your need for purchased composts and fertilizers.

What kind of tools do you really need?

Sometimes, the cost of starting and maintaining a garden makes people decide not to start a garden after all. Having to buy all those tools, a ground cover or wood for a raised bed, compost, top soil, the seeds… If you are trying to grow food to save money, you may not have a lot of money to throw into starting a garden. I hear ya! If you feel gardening has to be expensive, may I humbly ask you what you feel you really need?

I will warn you that I am a very basic person. My goal is a functional garden that grows a lot of food. To do this, you don’t need much.

The very first year I started a garden, I did a few things wrong, financially speaking. We rented a tiller, purchased seedlings, purchased mulch, and popped it all in the ground. It was rather spur of the moment, and I think had I had time to plan a little better, the garden could have been much more affordable. I am posting this type of an article now, so you have all winter to plan and ponder your future garden. Every year since then, my garden has been grown using more affordable means.

My most frugal garden required a shovel, a hand tiller, hose, a trowel and seeds. I turned over the dirt in my small backyard gardens by hand each spring. My gardens were about 12×19, and some were smaller. I had several spots through the front and back yard. Once I turned the dirt over, I planted the seeds or the seedlings I started from seed. I used a hose to water. I had rabbits at the time, and used their bedding as compost and mulch throughout the garden. The nice thing about rabbit manure is that it isn’t ‘hot,’ meaning you can put it right from their cage into your garden without needing to compost it first.

The most common tool I hear people worry about being able to afford to have access to, is a tiller. It wasn’t until a few years after my first garden that I began using one – and now 15 years later I am using one much, much less! I can assure you it isn’t necessary.

My garden tool collection has added on over the years, but I still find myself using the basics each year. If you choose to start to seeds yourself earlier in the season, you will need different supplies, such as a quality seed starting mix, plug trays (they hold the dirt and seeds), a way to water the delicate seedlings (a spray bottle if you only have a few, or a small compressed air pump sprayer) and most likely shelving of some sort and lighting (regular shop lights work just fine for seed starting).

If your budget allows, you may find a stirrup hoe a great add-on for weeding. A rake is helpful for raking up leaves and debris, and maintaining the mulch on your beds.

The bare basics:

  • Spade shovel, hand tiller or walk behind tiller – or neither of these if you prefer a no-dig garden. See ‘Do you need a tiller?’
  • Trowel
  • Hose or watering can
  • Seeds/Seedlings
  • Ground cover of some sort – cardboard, mulch, and organic matter/compost. Some years I simply used grass clippings and/or leaves.
  • A journal/notebook for record keeping

Nice to Have:

  • A garden hoe, I recommend a stirrup hoe for weeding
  • Rake
  • Seeders
  • Row markers/string
  • Compressed air sprayer, plug trays, seed starting mix for starting seedlings indoors
  • Knee pads and a tarp to sit on
  • Garden gloves (helpful for prickly weeds!)
  • Steaks/trellis/tomato cages/step-in posts with wire

When it comes to acquiring these tools, I highly suggest looking in places like thrift stores and yard sales. I have found a lot of my tools that way. Also, look on craigslist for used tools, word of mouth, and the buy/sell groups on Facebook. Maybe a gardening friend would be happy to let you borrow tools as you need them, so that the lack of tools won’t stand in the way of being able to try gardening!

What would you change on this list? What tools do you use every year?

DIY Garden Journal

I love keeping records.  They have helped me in so many ways.  I keep a binder for most every aspect of my farm.  I will focus on my garden journal here. As my needs change, so does my garden journal. It’s never quite the same year after year, but here are the things that are always included in it:

  • I know when I started my seeds the year before last and how well they did, what their conditions were, when they started to sprout, the percentage of how many made it in the ground, and how the plants did through the season.  I jot down notes nearly daily about what I did and how my seedlings are doing, maintenance in the garden, compost applications, etc. etc.
  • I keep track of experiments.  That way, when I try to remember how my potatoes in 5 gallon buckets experiment went, I can remember.  When I wonder when I planted my beets the year before and how the weather was, I can better prepare the next year knowing that they survived despite wintery weather.
  • I can track my expenses.  Then I can see how much money seed saving is saving me because year after year I try to save different types of seeds.  I can also see how much I spent on nursery trays, starter soil, etc. and see savings the next year when I re-use them and begin to make my own starter soil.  I can track what vegetables sold best, how much I sold, how much profit I made, and prepare myself better for the next year.
  • I keep track of harvests.  I can guesstimate how many tomato plants I need based on the previous seasons planting.  Of course different weather and watering conditions can affect yields, this is just an estimation.  I can also see that “x” number of plants yielded “x” pounds of tomatoes and what I did with them – this helps me better prepare my pantry by taking inventory before canning season to see where I need more of what.
  • I keep track of my schedules.  Spring, summer, and fall gardens.  Succession plantings.  This helps me prepare mentally for the season ahead so I know when seeds need to be started, how many, and I can keep things rolling smoothly.
  • Charts.  I love charts.  I have a section in my binder devoted to charts I have found on the internet.  Charts that tell me, approximately, how much of what vegetable I should grow per person, how many seeds I need for 25, 50 and 100ft. rows of vegetables, planting schedules, companion planting, estimated yields, and lists of what vegetables belong in what family to assist with proper rotation,etc.
  • Inventory.  Perhaps the “bread and butter” of my journal.  I keep a spreadsheet of what seed packets I have, the size of their packet, approximately how many seeds per pack, my goal for planting, list price and what I paid.   I highlight the heirloom varieties so I know what seedlings need to be marked, covered at times to prevent cross pollination, and can keep a general eye on them as these varieties I try to save my seed from, to use the next year.  I don’t yet save seed from all my plants, but I do hope to reduce my seed costs each year by expanding the plants I do save seed from, learning a few more each year.
  • Seed saving notes – I can keep track of seed saving techniques, make note of what plants I am going to save seed from,  and track what I save through the season for next year.
  • Planning – I have a section with graph paper and notes so I can plan out the layout of my garden.  I will be rotating so it will be helpful to keep track of where I planted everything year to year.  I also want to be sure my taller vegetables aren’t shading my shorter vegetables.  I want to make sure the things planted near each other are companions.  Being able to graph all of this out is helpful, so I have a basic idea of where everything should go, how long I want my rows, how many of each veggie I can put in each row, how wide my aisles should be, etc.

You can create your own garden journal using a word processing program such as Microsoft Word or the open source Open Office. If you google terms like ‘garden journal’ you will find lots of pages you can print for free. Others have made their garden journals available for a small fee so most of the work is done for you.

You can buy dividers, or create your own. I like to sub-divide my sections further, so the main category is listed along side the vertical edge of the binder, and the sub-divisions are at the top of the page, horizontally. I tape the name of the category to a piece of cardstock to give the divider some strength.

These can be as elaborate or not as you wish. Some years I will simply use a planner from the store. I summarize what I did in the garden on a specific calendar box, then lay out all the details in the lined pages set aside for the weeks happenings. Sometimes I need to add pages, so I will staple them in or use paper clips. The end of most planners usually has several empty, lined pages. I use those for ‘at-a-glance’ type things.

If you keep garden notes, I would love to hear how you do it!

Winterizing Your Garden

Fall is officially here. For many, that means the garden has finished producing, or is close to it. There are things we should do to winterize our garden, to protect the soil and reduce our workload come spring.

The three main jobs of winterizing include: removing plants and weeds from garden beds, adding compost, and covering your soil. There are other tasks that are important as well, such as thinning your strawberry beds, pruning brambles, cleaning/sharpening/oiling your tools, washing your plug trays, etc. We can talk about the little things in a future post, but tonight we will focus on readying the beds for planting next year and protecting the soil over the winter.

  1. Removing plants and weeds: Remove all plants that are done producing for the year, as well as all weeds. You want to be sure to get the roots of those weeds, so they don’t come back! The roots of your vegetables are fine to stay, if you want to cut the plant at ground level. The roots will decompose and feed the microorganisms that make nutrients available to your plants. You can also remove them. If your garden is still producing, wait to remove everything – some cold hardy vegetables will withstand a light frost, extending the life of your garden for a bit of time after everything else has died. If you have a perennial bed full of strawberries, asparagus, etc. you certainly don’t want to remove those plants – focus on removing weeds. Take all of your garden residue, minus weeds that have gone to seed and any thistle, to the compost bin. If you are pulling diseased plants or those covered by pests, do not add those to the compost! Burn them or take them to another area to decompose far from your garden. Also, remove whatever produce may have been rotting in the beds.
  2. Add Compost: This is especially important for raised beds. Over the growing season soil is lost – organic matter breaks down, or soil is clumped in roots of weeds pulled out, or sometimes it’s just compacted down and you aren’t left with much to grow plants in. Add compost back to your soil. It will help the integrity of your soil, reduce compaction, add nutrients back in, and provide a great place to plant in next season. You can make your own compost, or purchase it.
  3. Cover Your Soil: Winter can be pretty harsh on bare-dirt beds. Winter snow can compact it, sunlight can bake it, and all the thaw/spring rains can leach nutrients from it. Weeds are also quick to grow and have some of the most hardy seeds around – they are the first thing to sprout in the spring. Having a cover will protect against all of these. You can plant a cover crop, such as clover (or, look into deer food plot seed mixes – they are generally mostly clover and might be more affordable than buying seed from a local grain mill). Cover crops work by covering your soil (after you have removed your plants and weeds) through the winter with a living cover, then you turn it under the following spring, before it goes to seed. Clover is especially nice because it will fix nitrogen in your soil. It does contain things that will make seeding difficult for a few weeks after turning it under (seeds probably won’t germinate), so plan to turn the soil under a few weeks before you intend to plant seed. This isn’t particularly helpful in a raised bed though, unless you can easily turn the soil yourself. Another fantastic option is a covering your soil with mulch. Finally, if you do not have access to either option, a tarp will work as well. While the tarp will not enhance your soil, it will protect it!

Of course, a perfectly cleaned up garden isn’t necessary – some beneficial bugs will hibernate in plant residue/stalks, so if you have a spot in your garden that is a little wild looking, your garden buddies will thank you.

Think Ahead: Make Simple Beds Now!

As a gardener, I am constantly thinking ahead. My thoughts never stop at the current years garden, I try to think years ahead. And every summer/fall I feel like I am thinking more about the next years garden than I am about my current garden. This is because successful gardening benefits from planning and preparation. I am going to share with you an idea to easily make permanent garden beds without having to dig or rototill. This will create a bed that you won’t need to rototill, but thanks to earthworms and other creepy-crawlies underground, your soil won’t need it.

A few years ago I started making a big change toward no-dig beds in my garden. I usually have about 60 beds, but I change the nonpermanent bed structure around from year to year, but I generally have around 60 beds and a few bigger plots for corn and squash. Because of how many beds I have, and the fact that my garden is tended to be me and my children, going 100% no till is a process. I don’t have a tractor, or superhuman strength, but each year more and more beds get converted and it will be a work in progress for another couple of years. If I can do this while homeschooling eight children, it gives me hope that anyone can get a bed or two put together without having to rent any equipment or spend hours you may not have. I don’t even use a tiller to make my beds in the fall anymore!

All you need is cardboard, compost, and mulch. And if you start your bed now, it should be ready to plant into in the spring without much prep work at all. I have spent many a spring tilling, pulling weeds, and spending so much time preparing beds when I should be sowing seed and transplanting. Switching to no till beds has been a big time saver in the spring, then I can put time into them to refresh them later in the season.

If you are frugal-minded (I am, so I thought I’d share some ideas to keep costs low), you can save cardboard from your household, ask friends to save , or ask local stores if you can take some of the cardboard they are discarding. I have a store locally that will let me take all the cardboard I want! Stay away from boxes that have been covered in wax or a glossy finish. As far as compost, many farms are willing to just give it away if you have a way to haul it. Some will let you drop a trailer at their farm and they will fill it when they clean their barn, others may have a tractor that they can load their manure pile into. If you are really lucky, they may have manure that has already aged and is just sitting around! If you have rabbits, their manure is like garden gold – it doesn’t require aging and it does lovely things to your garden. As far as mulch, if you have an accessible spot you might be able to talk your local tree service into dropping a load of tree mulch in your driveway or backyard, maybe a friend will have a spoiled bale of straw, maybe you can save newspaper and ask that your friends do, too. Here are some mulch ideas.

I am going to assume you know exactly where you want to place your bed. I will write up a post about garden planning soon. You want to be sure your spot has enough sunlight, fertile soil and good drainage before placing a bed on it. Then cut the grass nice a low, lay cardboard down completely covering your bed, then pile on compost. Depending on the time of year you are doing this, mulch (if you choose to use it) can be put on right away or wait – I prefer to make new beds in the fall, or at least get the cardboard and compost on. Then, after a good frost I will put the mulch on (though, admittedly, I have put mulch on any time of year just because if I have the time, I need to take it… but my preference for topping with mulch is after a good frost). That is the basic idea.

Some people prefer to rototill the soil before placing cardboard on. Some people prefer to dig out the center and place old/moldy straw or hay in the center before piling dirt back on. There are a variety of ways to go about this.

You can do rows or your entire garden. I do rows, about 50ft long, about 4ft wide and I leave a small path to walk on and get a wheelbarrow down. to keep the paths walkable, I use a weedwacker and go over the grass once a week in my aisles.

As far as upkeep, each year I place a new layer (though not as thick) of compost on at least once a year, if not a couple of times depending on if the crop I am growing is a heavy feeder or not. I also refresh the mulch once a year with a few inches of wood chips that have aged a year, or moldy hay.

What can you plant in August?

For those of you who think after you got your garden in, during May and June, that your garden was in and done for the season may be surprised to know that there is another round of gardening that you can take advantage of: Fall Gardening.

You can grow just about anything in your fall garden that you would have wanted in your spring garden. I like to think of a fall garden as my ‘second chance’ when things don’t go as planned in the spring. I think seeds and seedlings grow better because our spring weather is just so unpredictable and by now we are in a pretty regular pattern, the soil is warm, the rains aren’t so cold, and seeds and seedlings just get off to a better start. If only we could wait until now to plant our summer gardens! But alas, winter comes too quick for that – but that cooler weather is what spring crops – cool crops – prefer.

After your summer garden is winding down and bare spots appear from pulling plants, digging potatoes, etc. you can fill those spots in with your fall planting. The benefit to a fall garden goes beyond fresh food later into the season – you can also keep your soil covered with useful plants which reduces weeds and keeps your soil thriving.

Cool weather crops can tolerate a frost, some even taste better after a frost. Cool weather crops include things like peas, greens, broccoli, cauliflower, kohlrabi, beets, carrots. Root crops can actually stay in the ground longer without being affected by a frost, too.

To figure out what you have time for, calculate your first frost date and count the days from the date you want to plant, until your first frost. Then, add up the number of days to germination and maturity from your seed packet. If those days fall within the number of days until our first frost, you are good to plant. Keep in mind that the first frost date is an average and is in no way predicting when our first frost will actually happen – you may get a longer growing season than anticipated. I say if you’re on the fence about planting something – give it a shot! You can cover some plants if need be later in the season to avoid frost damage. Days to maturity may vary according to variety, so if one variety looks like it may take too long, check out another!

What can still be planted?

  • Beets – in fact you can plant these in succession for a continual harvest from spring through fall.
  • Beans – you can also plant these in succession!
  • Brassicas – cabbage, broccoli, cauliflower, kohlrabi. Because these plants are maturing in the cool weather and not rushing to finish in the summer heat, you will get bigger heads and a lovely harvest. They can handle a light frost, which extends their season when nights freeze but days are still nice. *you would want to plant these in early August or late July
  • Cucumbers – pickling cucumbers are fast maturing and will grow well for the same reasons stated for zucchini.
  • Swiss chard
  • Kale, collards. These develop a sweeter flavor after a frost.
  • Turnips
  • Bunching onions
  • Carrots – these will get sweeter as the weather gets colder.
  • Peas – peas hate warm temperatures, but they sprout better in warm soil. August planting is perfect for a strong start! They will sprout in the warm soil, then enjoy the cooler temperatures as the season winds down. The harvest will be longer now than in spring.
  • Zucchini (yep! this fast maturing plant will actually do well in milder temperatures vs. high temperatures and a fall planting can avoid many of the common issues we struggle with every summer such as powdery mildew, stress and pests!)

Later August:

  • Radishes
  • Spinach
  • Lettuces

Happy growing!

What is a Hardiness Zone?

Gardeners refer to their hardiness zone quite a bit…. What is that?

Our country is divided into certain growing zones, because certain things grow better in some areas than others. As well, something that grows as a perennial in some zones, may have to be treated as a annual in others. These hardiness zones are based on the average low temperatures during the winter. Something that grows well in Florida may not grow well up here in Michigan due to differences in climate, In the US we start at zone 1, and go up to zone 13. If you were looking in a seed catalog to find a plant that would grow well in your area, knowing your zone will help you pick out the plants that are best suited for you.

When looking at seed packets and considering your hardiness zone, sometimes the zones the plant grows well in will be a range, say, zones 3-7. It’s important to make note that if you are trying to grow something in a zone higher than 7, it will not grow well because it needs the dormancy period that winter time provides in those zones.

To find your zone, visit this link and place your zipcode in the box that asks for it. You will notice Michigan is home to several different zones – knowing your unique zone will be very helpful in your gardening success!