Purchasing new chicks is such an exciting adventure. Even for us, while we purchase hundreds and hundreds of chicks each year (for both meat and new egg layers), every new batch is still exciting to me even after 10
+ years!). Chicks do require some care that you should know about before embarking in this adventure. In this post, I will share with you how we welcome new chicks to our homestead.
Chicks usually come in one of two ways; either by mail or by purchase at a local farm store or local hatchery.
If you purchased chicks from a far away hatchery and chicks have been mailed to you, they were shipped at a day old (usually) and will arrive to you having never been introduced to food or water. How do these chicks survive without food or water during transit? They are not fed while traveling. They are still digesting the yolk sac from the egg! For these chicks especially, it’s important to introduce them to food and water immediately upon arrival to your home. Dip their beaks gently in each. Generally just the first few may need to be introduced, the rest will come over to investigate. If they don’t, introduce all of them so they can begin eating and drinking, which will help them begin to recover from the stress of traveling.
When your chicks arrive at your local post office, you may receive a phone call to pick them up, or they may deliver them to your home if you are there. If you have the chance to specify one or the other, the less stressful option is to have you pick them up from the post office vs. having the chicks travel the days route until they get to your home. Either way, plan to be home to accept your chicks when they arrive.
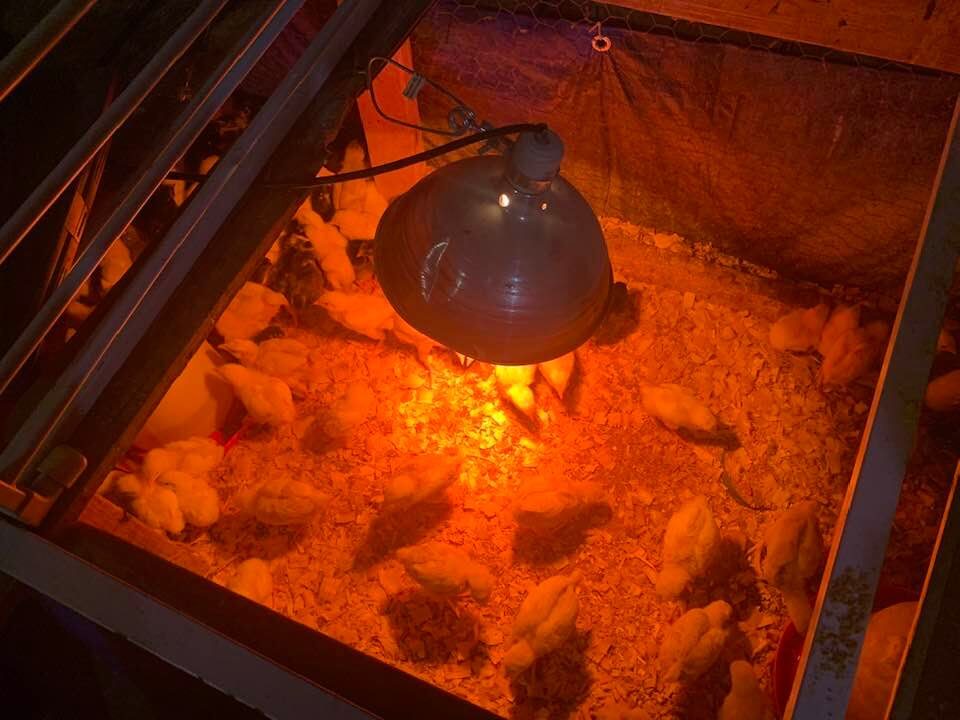
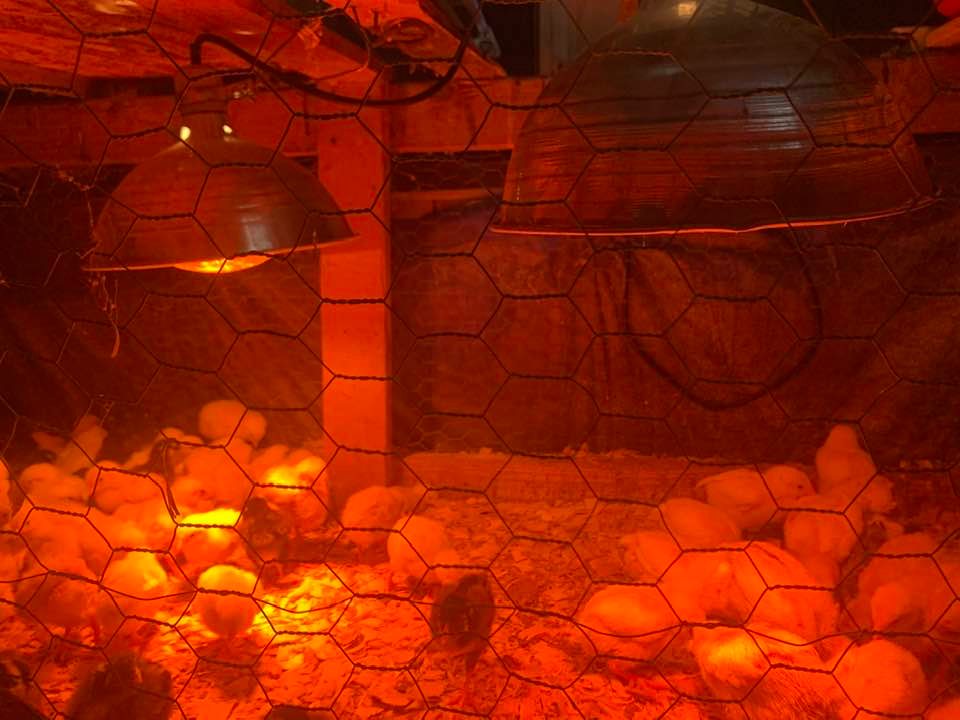
What do you need to raise chicks? Raising chicks is much different than caring for mature chickens. They require some different equipment and care. For starters, they need a starter home that is well protected against weather, predators, things that go boo in the night, drafts, and moisture. This is known as a brooder. It can be as simple as a large cardboard box if it is kept in a protected area such as your barn or garage (depending on time of year). They’ll also need a feeder (like this or this), waterer (like this), heat lamp (like this) with bulb (like this), bedding (I use shavings). Chicks initially cannot regulate their body temperature so the use of a heat lamp does that for them. Once they grow up a bit, they can go out in their permanent home – the outdoor chicken coop – and that generally takes 6-8 weeks which is also weather dependent.
When my chicks arrive, I like to put apple cider vinegar in warm water the first day or two, generally 1 tablespoon per gallon. It isn’t essential, so if you don’t have any, don’t panic. I like to think it gives them a boost and is a positive for them as they recover from traveling. Warm water is not as shocking as cold water to their stressed systems. After the first day or two, I use cold water. I keep food available at all times for the first two weeks – after about two weeks I find that I need to separate my egg layers from my meat birds, because my meat birds need to begin a gentle rationing of feed and my layers are a little more, well, sophisticated and lady-like and don’t pig down all the food that is set in front of them.
No matter how your chicks arrive, traveling is stressful and the smoothest transition will benefit them as they begin to recover – too much stress can lead to death. Here are some tips to welcome them home:
- Have the brooder all set up and waiting for them. Make sure it is breathable, but not drafty, a lid is handy (make sure it won’t trap heat – a lid made from chicken wire is ideal vs. a solid lid), and have bedding on the floor such as pine shavings.
- Introduce them to food and water. If you purchase your chicks from a local farm store or hatchery, they have already been introduced to food and water. As the chicks get bigger and messier, you may find that hanging the food and water breast-high to be helpful in keeping the food and water cleaner.
- Make sure their brooder is in a quiet place, free of drafts, with a heat lamp set at the proper height to ensure they can stay warm, but still have a perimeter they can walk to if it gets too warm under the light.
- Prevent handling much as they settle in. We have a rule that chicks are hands-off the first few days after their arrival.
- Watch chicks after refilling water containers – even if the water containers just had water in them, chicks will often come flocking over to the new water, drenching themselves. Be sure they don’t catch a chill. Meat birds especially are prone to ‘piling up’ to warm up, which can suffocate the birds on the bottom layer.
- Keep the area under the heat lamp, around the feeder, and especially around the water clean and dry.
- Wash the waterer regularly.
- Remember, chicks can’t fly!! Watch chicks carefully with children to ensure their safety. Use both hands to gently cup the chick close to your body as you are holding it, as chicks are quite delicate. Set the down carefully, don’t drop them. Dropping can cause injury!
How do you know if the chicks are warm enough or cold? Chicks that are too hot or too cold for too long will die, so keeping the temperature comfortable is crucial. Chicks prefer surprisingly warm temperatures in their early days, but gradually are able to handle colder temperatures. The ideal setting for the first week is 95 degrees (F) under the heat lamp, with the heat radius large enough to accomodate all of your chicks. If you have a lot of chicks, you may need several heat lamps. But it is also very important that your brooder is large enough to have an area outside of the heat lamps reach that chicks can go to when the temperature gets too warm under the lamp. Healthy chicks will be moving all over with happy, occasional chirping. They will also take short, frequent naps. If your chicks are huddled together and chirping frequently, loudly, they are cold. If they are panting with their wings held out to their side, they are too hot and have not been able to find an area to cool off in.
After the first week, you can reduce the temperature in the brooder by 5 degrees (F) each week, but this is where observation of your chicks is really key. You can purchase a brooder thermometer to keep at ground level so you can monitor the temperature in the brooder, or you can just watch your chicks. The very first time I raised chicks, I used a thermometer and I think it created a lot more stress trying to nail the perfect temperature all the time. Chicks will find heat when they need it, if it’s available. They will walk out from under the heat lamp if space allows, if they are too hot. If you watch the signs I talked about in the above paragraph, you don’t need to pay any attention to the actual temperature in the brooder. If the chicks can’t seem to get warm, lower the heat lamp (but no lower than about 18 inches from the floor), or add another heat lamp (be sure there is an area they can go if they get too hot). As the chicks get older and become feathered, you can raise the heat lamp (which will reduce how hot it gets), or turn it off during the day and put it back on at night. A lot of this depends on the temperature in the room they are in, also.
Watch for pasty butt. Pasty butt is a fairly common condition that new chicks can experience (as a result of stress) when their soft manure sticks to their feathers, creating a blockage. It generally does not come off on its own and can kill your chick quickly, so watch for it and remove the poo with a warm, moist wash cloth or q-tip. Be very careful as you remove it though, as chicks are very delicate. Keep watch for it, as it may happen again. It will generally clear up after a few days.
A word about heat lamps. Heat lamps will start fires if the bulb explodes or the lamp falls on bedding. I always suggest having the light secured by both the clamp and the cord, so that if the clamp fails (and sometimes they do, or whatever you have it clamped on fails), you still have a chance at preventing fire by having the cord secure. I have had several friends experience fires because of heat lamps. It is recommended that these not be used in your home, wherever they are secured make sure that there are no animals that may bump into them by jumping or flying near them, and have a plan in place. In our case, we have a fire extinguisher right at the door to the chick nursery, and have a fire ball installed above the brooder so that if the worst was to happen and a fire started, within 2-3 seconds the ball will explode and extinguish the fire.
Say, you got a nice article.Really looking forward to read more. Really Great.
Thanks-a-mundo for the article.Really thank you! Want more.
I am so grateful for your article.Really looking forward to read more. Great.
Im obliged for the article post.Really thank you! Cool.
I really like and appreciate your post.Thanks Again.
I am so grateful for your article.Thanks Again. Really Great.
Awesome article.Really thank you!
This is one awesome blog post.Really thank you! Cool.
I am so grateful for your article post.Really thank you! Fantastic.
Fantastic article post.Really thank you! Great.
Looking forward to reading more. Great blog article. Fantastic.
A big thank you for your blog post.Much thanks again. Fantastic.
I really liked your blog.Really looking forward to read more. Really Cool.
Hey, thanks for the article.Thanks Again. Really Great.
Enjoyed every bit of your blog.Much thanks again. Awesome.
Thanks again for the article. Cool.
A big thank you for your post.Thanks Again. Will read on…
Awesome article post.Thanks Again. Keep writing.
Thanks a lot for the blog article.Really thank you! Much obliged.
Wow, great blog article.Really looking forward to read more. Want more.
Very informative blog.Really thank you! Awesome.
Im thankful for the article.Thanks Again. Cool.
Awesome blog post. Cool.
I cannot thank you enough for the post.Really looking forward to read more. Really Great.
Thanks again for the post.Much thanks again.
Very good article.Thanks Again. Great.
I really like and appreciate your article.Really thank you! Great.
Thanks for the article post.Thanks Again. Much obliged.
wow, awesome blog article.Really thank you! Really Cool.
Appreciate you sharing, great blog post.Thanks Again. Cool.
Really appreciate you sharing this blog post.Really looking forward to read more. Want more.
I value the blog.Much thanks again. Keep writing.
I really like and appreciate your blog.Really thank you! Much obliged.
I really liked your article.Much thanks again. Really Great.
Very neat article post.Really thank you! Want more.
Thanks for sharing, this is a fantastic blog post.Really thank you! Awesome.
Thanks for sharing, this is a fantastic blog.Really thank you! Fantastic.
Appreciate you sharing, great blog.Really looking forward to read more. Awesome.
Thank you ever so for you article.Really looking forward to read more. Really Great.
Looking forward to reading more. Great blog.Really looking forward to read more. Keep writing.
Thank you ever so for you blog.Much thanks again. Really Great.
Heya i am for the first time here. I came across this board and I find It truly useful & it helped me
out much. I hope to give something back and help others like
you helped me.
Feel free to visit my blog vpn coupon 2024
Hello there, I found your website by means of Google at the same time as looking
for a similar matter, your site came up, it seems good. I’ve bookmarked it in my google bookmarks.
Hi there, simply became alert to your weblog via Google, and
found that it’s truly informative. I’m gonna be careful for brussels.
I will be grateful if you happen to continue this in future.
Many people will probably be benefited from your writing.
Cheers!
Have a look at my webpage: vpn code 2024
Looking forward to reading more. Great post.Really looking forward to read more. Fantastic.
I will immediately seize your rss feed as I can not facebook vs eharmony to find love online your email subscription hyperlink or
newsletter service. Do you have any? Please allow me recognize so that I may just subscribe.
Thanks.
First off I want to say terrific blog! I had
a quick question that I’d like to ask if you don’t mind.
I was interested to know how you center yourself and clear your
thoughts before writing. I have had a tough time
clearing my mind in getting my ideas out there. I truly
do enjoy writing however it just seems like the first 10
to 15 minutes are lost just trying to figure out how to begin. Any ideas or hints?
Kudos!
My homepage: eharmony special coupon code 2024
For the reason that the admin of this web page is working, no hesitation very quickly it will be well-known, due to its feature contents.
Here is my blog: nordvpn special coupon code
Website tools designed to address black screen issues are vital for web developers facing display problems. These tools help diagnose the underlying causes, such as incompatible plugins, corrupted files, or server errors. By offering detailed error logs and troubleshooting steps, they enable developers to pinpoint and resolve issues efficiently. Utilizing these tools ensures that websites remain functional and user-friendly, preventing significant downtime and maintaining a positive user experience. https://blackscreen.space/
Major thanks for the article post. Much thanks again.
My website: анал порно
This article was a fantastic read! I appreciate the depth of information and the clear, concise way it was presented It’s evident that a lot of research and expertise went into crafting this post, and it really shines through in the quality of the content I particularly found the first and last sections to be incredibly insightful It sparked a few thoughts and questions I’d love to explore further Could you elaborate more on next time? Also, if you have any recommended resources for further reading on this topic, I’d be grateful Thanks for sharing your knowledge and contributing to a deeper understanding of this subject! I dedicated time to make a comment on this post immidiately after reading it, keep up the good work and i will be checking back again for more update i appreciate the effort to write such a fantastic piece
My website: russkoeporno365.pro