-
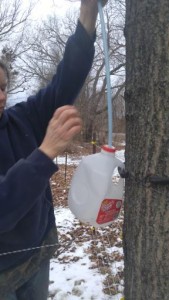
- Attached tubing to container, now to drill the hole for the tap.
-

- “I can hear the drip, drip, drip!”
-
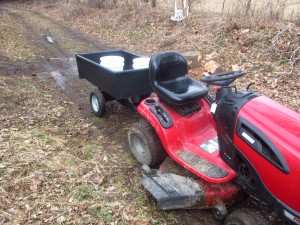
- Collecting sap
-
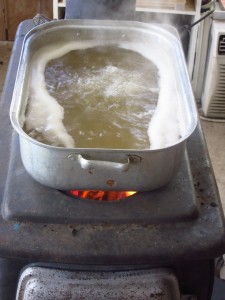
- Boiling
-
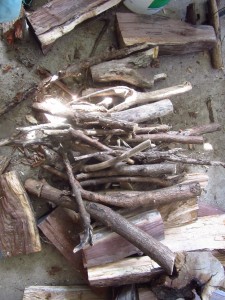
- We cut up old scrap trees and branches from the burn pile.
-
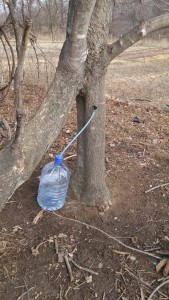
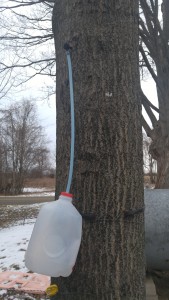
- One of our collection containers
-
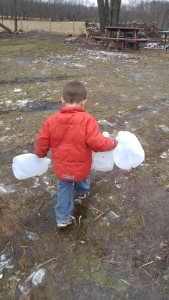
- Add in a really cute, helpful 3 year old
-
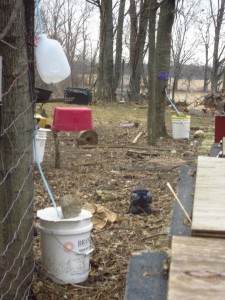
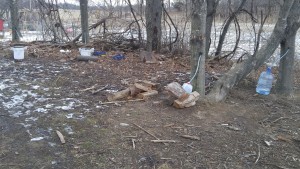
- Another grouping
-
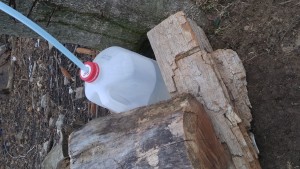
- Milk jug anchored in by logs (it was windy!)
-
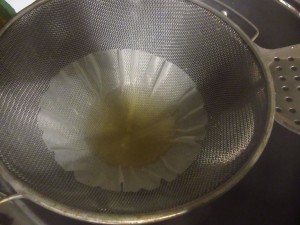
- Straining sap through a coffee filter before finishing
-
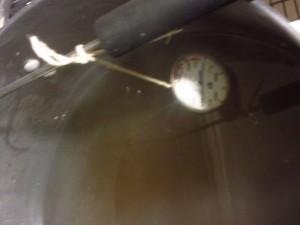
- Hanging candy thermometer from a long-handled spoon
-
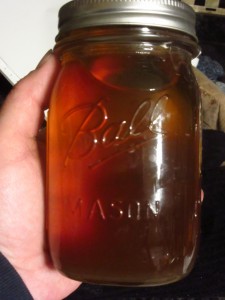
- Voila – the end product
Considering it’s maple syrup season, I thought I would share how we do things around here. I remembered where most of my maple trees were from this past summer when I could identify them easily from their leaves. Any maple can be tapped, plus there are a variety of other trees that can also be tapped for different tasting syrup. I found out how to identify maple trees during the winter, so I was able to identify more trees to tap.
The best time to tap is when you can see an extended period of time when nighttime temps are below freezing and daytime temps are above freezing. This is generally a 4-6 week period. You should collect sap regularly, but you don’t have to boil it all down at once. You can collect it in a larger, clean container through the week to boil down on the weekend or something like that.
This is my first year, so I don’t have any specialized equipment other than taps and tubing. I’ve collected 5 gallon buckets for years – for food storage and farm use – so it wasn’t too hard to come up with containers for collecting. We also use milk jugs and empty water jugs. You can use soda bottles, mason jars (though they will have to be emptied regularly). When the sap isn’t running fast, I prefer milk jugs because it’s easy to tell when a jug is ready to be emptied without having to undo a lid. But when the sap is running fast, you have to empty the milk jugs a lot more often. We weight our buckets down with heavy rocks on the lid, and our milk jugs are bungee-corded or tied around a tree to keep them from blowing away. I empty containers 1-2 times per day, or more if needed though that is rare.
Considering this was my first year, I ordered the cheapest taps I could find on amazon. I found a set of 10, with 2 ft. of tubing, for $24.99. The tubing provides a path from tap to collection container, though you can purchase metal taps, and taps with hooks to hold a bucket right on the tree. So far, I am very happy with the sets that I purchased. I don’t use any special containers to boil the sap down – just the stuff I already have on hand.
To set up the taps, I first attached the tubing to the tap so I could set the tubing in the container and measure where I wanted my tap to go. From the research I have found, it’s best to tap on the southern side either low (preferably above a large root) or high, right under a big joint. I have them tapped high and low and some trees have 2 taps, though with wider ones you can even have 3 in one tree. If you have an issue with animals disturbing your containers, you may prefer to mount them all high rather than low.
Once tubing is attached I make sure it’s in the container far enough to not pop out even if jiggled around by the wind. Then I hold it up to the tree and drill a hole big enough to accommodate the tap. I am looking for light colored shavings as I drill, as dark colored shavings indicate injury or scar tissue, and a lack of useable sap. I use a rubber mallet to pound the tap in and adjust the lids on the container, adding rocks or something else heavy to weight the container down.
Then, I wait. I collect sap in the morning, check in the afternoon, then collect again in the evening if need be. I use my lawn tractor and trailer with a few empty 5 gallon buckets to dump the collection containers in. When I come back to the house I dump all the buckets in a clean garbage can used only for holding sap. From here I pour more sap into the pots that I boil down. The sap is clear just like water. It has a hint of sweetness to it, and you can drink it as-is, if you like. I often find my kids licking trees if a maple has an injury and happens to be leaking sap from the bark. Weird kids. Last year my goats licked the maple tree that we attached our gate to. It leaked for a while and the goats were too happy to lick the sap before it hit the ground and went to waste. Glad to see they share my determination to prevent food waste. ha ha.
Here is the thing most people don’t seem to want to deal with. Boiling the sap takes a long time. It can take all day. It’s best done out doors over a wood fire so the steam doesn’t saturate your home. It can take a lot of wood. I’ve read 2.5 face cords per 50 gallons of sap. Personally I can’t give you an estimate as to how much I use, because I am using wood from our scrap burn pile – thick branches from trees we have cut down that aren’t thick enough to do much to heat our home (we heat with wood), but are great to burn a hot fire, despite needing to feed the fire very regularly. My husband took a chainsaw to the pile and cut at regular lengths. We loaded it in the trailer and brought it up to the house. I much prefer putting that wood to good use and not use the wood specifically to heat our home. Next year I will have that on my mind each time we clear tree lines and remove any fallen trees from someones property – we need to keep those branches! You want thinner piece of wood. Even though they burn quick, they burn hot and keep your sap boiling!
In addition to using a wood stove, I have a professional-grade burner that I use to get water ready for scalding chickens when we butcher. It’s nice to have a portable burner for things like that. I get that up and running and keep a pot of sap boiling there, too. I’ve tried an electric roasting pan, but it never got hot enough to boil after hours of being on.
Once your sap is boiling down to a manageable amount, you can bring it in the house on your stovetop to finish. I use a strainer and a coffee filter to strain the liquid while it’s still manageable and not thick. From here, I bring the pot up to a boil and drop a thermometer in to keep an eye on things. I use what I have, so I’ve had to get creative by hanging a candy thermometer from kitchen string tied to a long handled spoon that sits on the top of my pot. You don’t want the bottom of the thermometer to touch the bottom of your pot.
The mixture may boil quite a while longer until it reduces enough to raise the temperature above boiling. You boil the mixture, without stirring, until it is 7 degrees (F) above boiling. At this point, you can cover (to prevent too much liquid loss from steam) and remove from heat. You can “can” the syrup for long term use. You can make candy with it. I’m sure you can come up with plenty of ways to use it in your home.
40-60 gallons of sap reduces to 1 gallon (or so) of syrup. Now you know why real maple syrup is so darn expensive!