
Oddly enough, for as long as I’ve been cooking, I had never experienced the magic of pan searing meat until a few years ago. My first experience pan searing was chicken with fresh garlic, rosemary and thyme. It was so simple, so quick and yet so moist and delicious. The magic of pan searing creates a one-of-a-kind flavor while forming a yummy crust (caramelizing) on the meat. I think I pan seared chicken in a variety of ways for a week straight until my husband said “Enough already!” There are so many ways you could season the meat or poultry while it’s in the skillet. I’ve since enjoyed pan searing pork chops and especially venison steaks. You could also do fish and shellfish. It’s a simple process, really.
Depending on what you are doing with your meat or poultry, you may not be cooking the meat all the way through using this method. Pan searing can be used in a variety of ways – to quickly create a crust and cook thinner cuts of meat, to brown the sides of a roast/poultry before you slow cook it, or to brown stew meat before putting it in the stew, etc. Thicker steaks, chops and chicken should finish cooking in the oven (normally preheated to 450-500F, but your recipe should specify) . Some thinner steaks and thin chicken breasts will easily cook through while being seared without being overcooked. You can pan sear cuts of meat for the flavor, then continue on with any recipe as called for. Instead of grilling chicken for a chicken salad or skillet meal, for example, you could pan sear it.
The Method
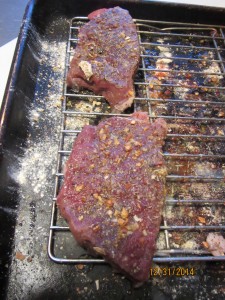
Bring your meat out of the fridge for about 30 minutes prior to cooking. I like to let my meat come to room temp on a drying rack so moisture can drip off and the meat can naturally dry off a bit before being cooked. Soggy meat tends to not sear as well, so if your meat is wet, pat it dry before it goes in the skillet – then season it. Heat a heavy bottomed skillet with enough olive oil to coat the bottom, over medium-high heat. Let this heat up a while – until it just begins to smoke just a touch (watch it – meat needs to go in immediately), or when you flick a drop of water in it, it should sizzle right up. Turn on your overhead fan if you have one.
Before you plop your meat in the skillet, season it as you wish. When you place your meat or poultry in the skillet, don’t overcrowd (it will steam instead of brown), don’t keep the meat too far apart (the juices and fat in between the meat may burn) and don’t mess with it! When the crust has formed, the protein will easily remove its self from the skillet. To check for done-ness, jiggle your skillet to see if the meat shakes around with it (don’t try to lift it and see if it’s browning). If it does, flip it to the other side. You can add fresh herbs now so they don’t burn if you wish. It may take up to three minutes or longer to flip. Don’t force the flip, keep checking to see if the meat has released yet but don’t try to force it or you may tear the crust off.
When your sear is sufficient, you can add a pat of butter to the pan and flip your protein once more to get a beautiful glaze and a bit of extra flavor.
If you are doing a big hunk of meat like a roast, brown all sides, not just top and bottom. When both sides have cooked, either place the meat on a plate to rest 5-10 minutes before eating, finish the cooking in the oven (preheated 450-500F oven until a meat thermometer reads the desired temp), or place your meat/poultry in the roasting pan, stock pot or whatever you will be cooking it in to finish your chosen recipe. Your meat or poultry will leave behind ‘brown bits’ which are extremely flavorful. Make a pan sauce with them to accompany your meal by deglazing your skillet and loosening those bits. If you are browning a roast or meat for a stew, deglaze the pan and add the liquid to the roasting pan or pot to flavor the meat and stew. If you don’t want a pan sauce to accompany your meal, at least deglaze the pan with water so you aren’t scraping it later. 🙂